

Soda bottles? Into Christmas boots? I know it seems like one of those crafts that sounds great but turns out messy and disappointing in real life. But after trying it myself, I can say this one is the real deal.
These little boots are genuinely adorable, and nobody would ever guess they’re made from recycled soda bottles.
The plastic gives them structure that you just can’t get from fabric or paper alone, and covering them with festive socks transforms them into something that actually looks intentional, hiding what’s underneath. Plus, there’s something satisfying about turning what would be trash into holiday décor.
The craft itself is great for kids, but it does require some careful cutting. If you’re working with children, they can help with the decorating and filling stages, but you might want to handle the bottle cutting yourself. Sharp scissors or a craft knife work best, and you’ll need a steady hand to get clean cuts.
Fill these adorable Christmas boot decorations with treats, greenery, or small gifts, and you’ve got yourself a decoration that’s cute and functional.
What You’ll Need
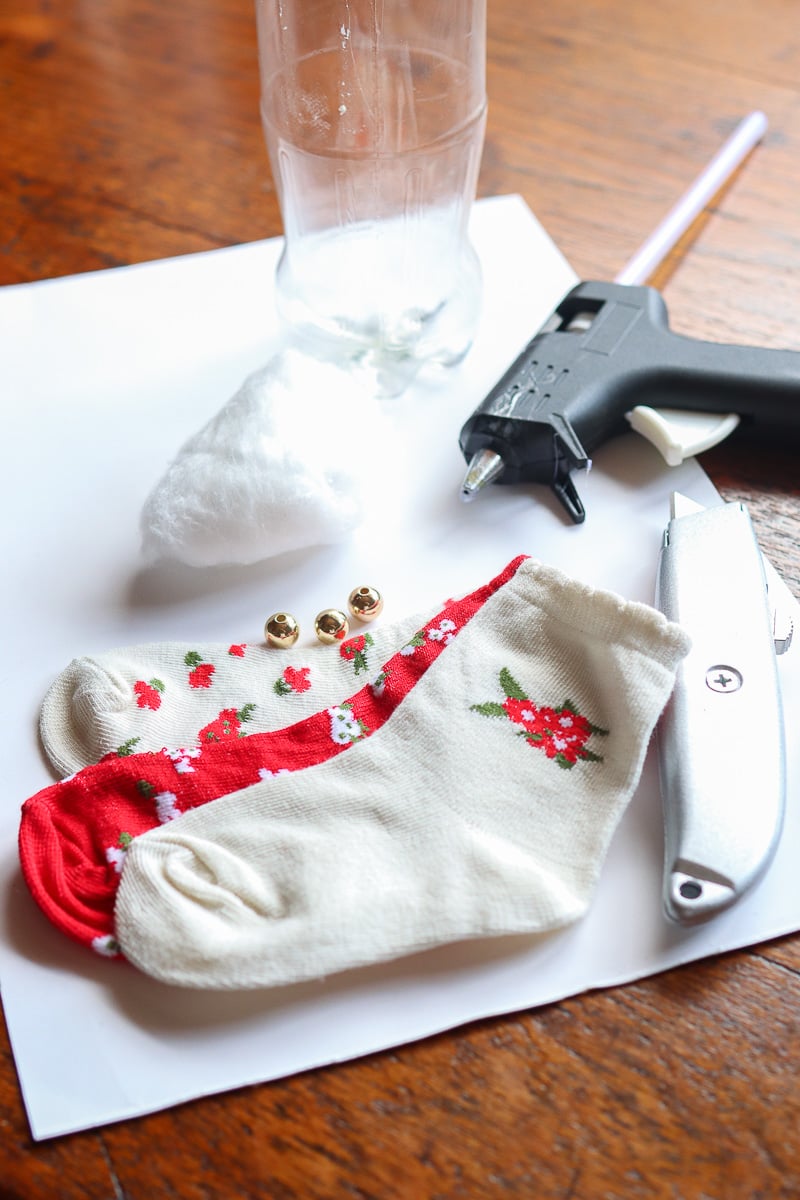
The structure of these Christmas boot decorations comes from plastic soda bottles. Any standard size works, although the smaller ones usually look better proportionally and don’t require massive socks to cover them. Wash them out thoroughly and remove the label before you start.
You’ll also need cardboard for the base. Something sturdy, like a shipping box, works well. Alternatively, a cereal box’s cardboard will do in a pinch if that’s what you have. The base needs to support the boot without bending, so a thicker base is better. You can also use hot glue to strengthen it so it doesn’t bend (which happened the first time I tried to get the socks on these).
Speaking of socks, for covering the boot, grab a festive sock. Holiday socks with patterns work beautifully, or you can use solid colors in red, green, or white. The sock needs to be large enough to stretch over the bottle structure. Thicker is better for more structure, but you can always work with what you have. I chose floral-patterned socks to complement the rest of my home décor. You can find all kinds of great Christmas sock options here.
A glue gun is essential here. You’ll be attaching plastic to cardboard and fabric to plastic, and regular glue isn’t ideal for this task. Hot glue bonds quickly and securely holds everything in place.
Finally, gather whatever you want to use for filling and decorating. Greenery, candy canes, small ornaments, tinsel, or ribbon. I kept it simple with some cotton wool. You’ll also need scissors or a craft knife for cutting both the bottle and the cardboard.
Step 1: Make a Boot Base Out of Cardboard
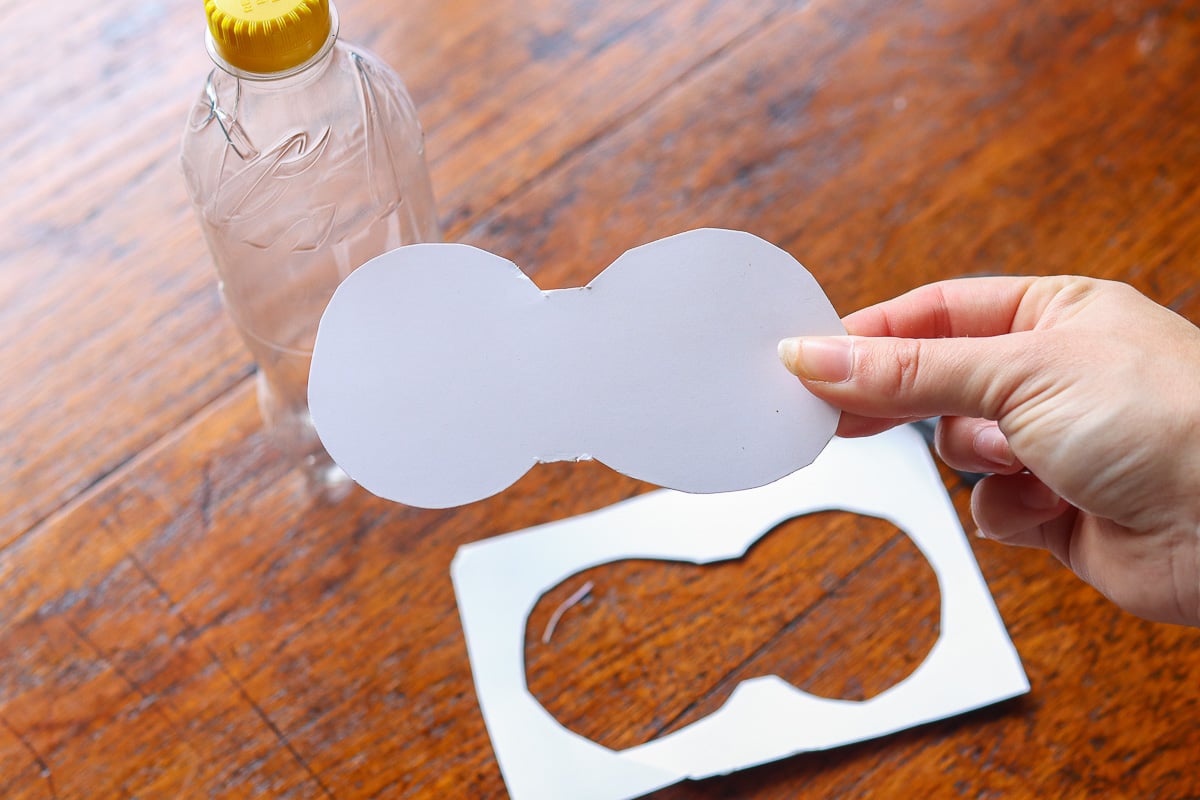
The cardboard base is what keeps your boot standing upright. To make it, sketch out a simple boot sole shape on your cardboard, using the base of your soda bottle as a guide. The shape doesn’t need to be perfect, but aim for something that resembles a boot rather than just a rectangle. The end result should almost look like a figure eight without the holes.
Cut out the boot sole, ensuring the edges are smooth. If you’re making multiple boots (which I recommend, because they look better displayed in pairs), trace your first sole and use it as a template for the rest. This keeps them uniform, which makes them look more polished when lined up.
The size of your base depends on the size of your bottle, but as a general rule, make it slightly larger than the diameter of the bottle’s bottom. You want the boot to look stable, and it’s much easier to glue with a bit of extra room to maneuver. Test the proportions by setting your bottle on the cardboard before you cut.
Step 2: Measure and Cut The Soda Bottle
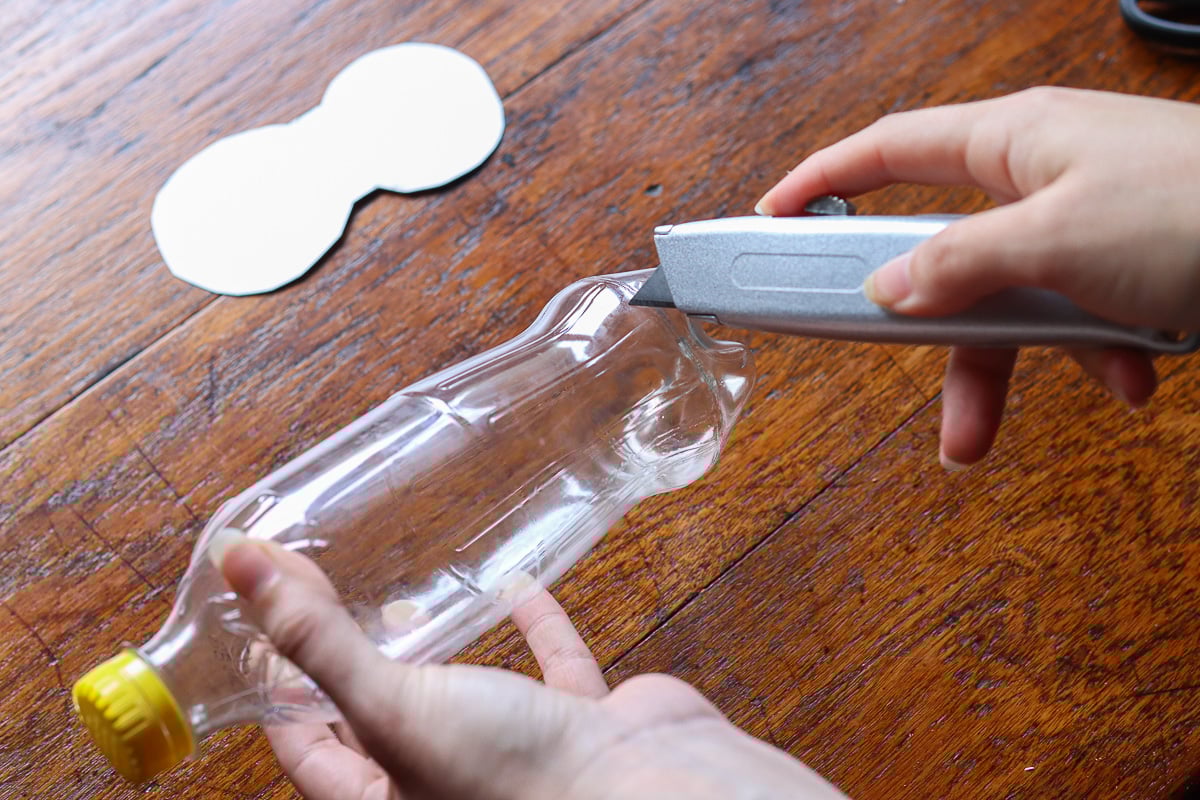
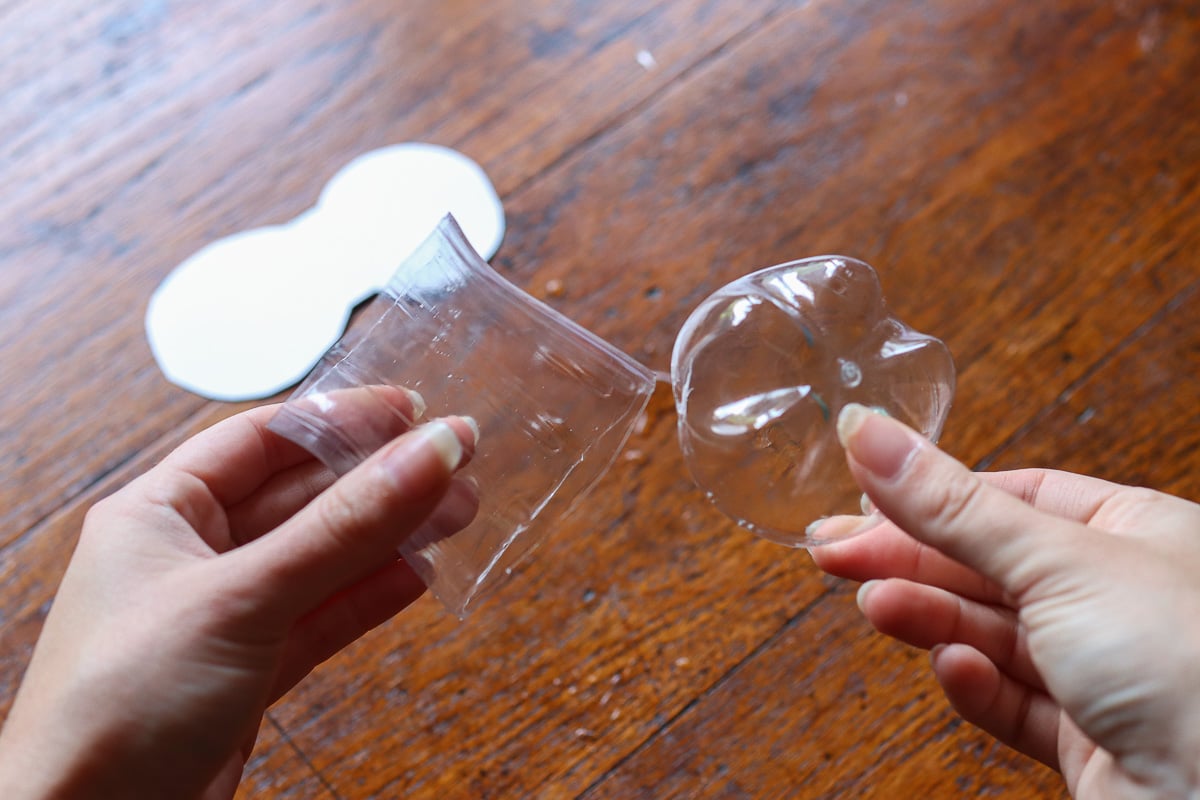
Next, you’re essentially cutting the bottle into two pieces that will form the front and back of the boot. Start by marking where you’ll make your cuts. The bottom curved section of the bottle will serve as the front of the boot, and a portion of the middle straight section will be used for the back.
For the front piece, cut around the bottom to remove the base of the bottle. This curved section becomes the toe and front of your boot. Set it aside. For the back piece, measure another section from the remaining part of the bottle. You’re cutting out a cylinder that will become the back leg portion of the boot, so you can decide on the size yourself based on how tall you want your boots to be.
The cuts don’t have to be perfectly straight, but try to keep them reasonably even. Rough edges will get hidden under the sock anyway. If you’re nervous about cutting, mark your lines with a permanent marker first so you have a guide to follow.
Step 3: Glue the Bottle to the Base
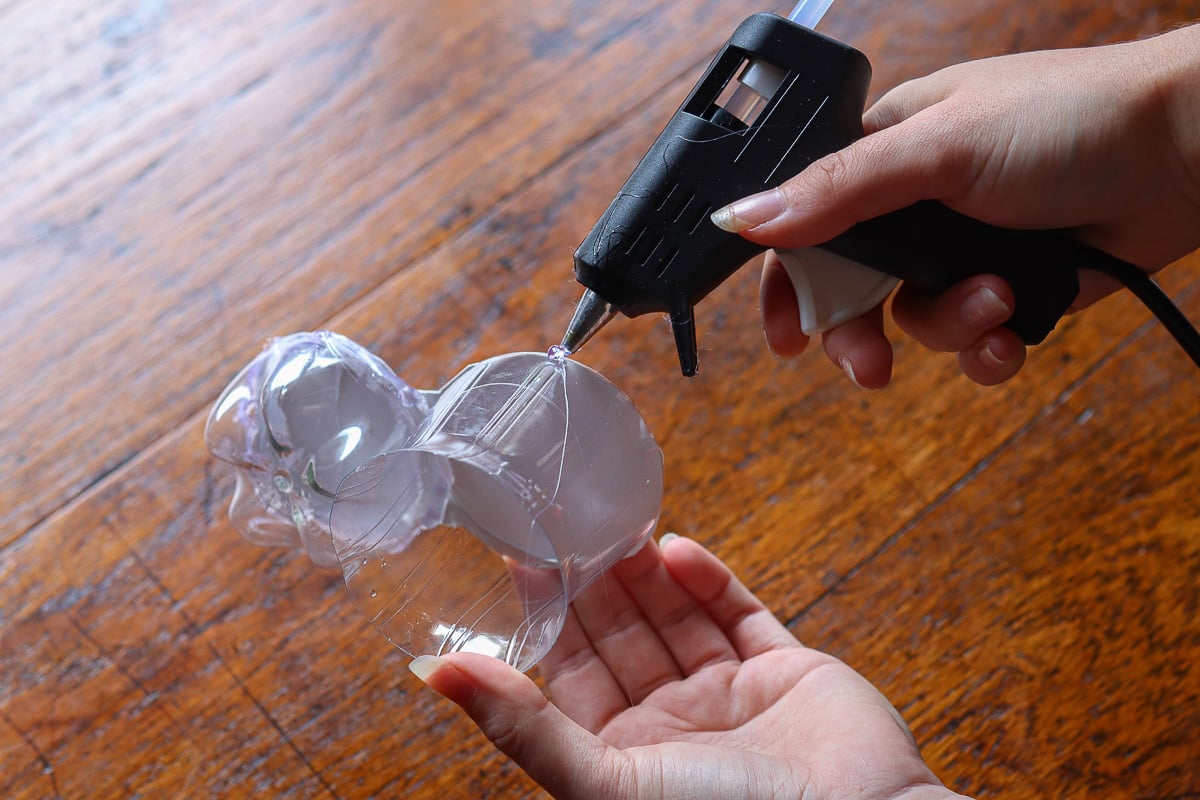
Now you’ll start seeing the Christmas boot decorations take shape. Position your curved bottom piece on the cardboard base where the toe area would be, then place your straight middle piece behind it to form the shaft of the boot. The two pieces should connect to create an L-shape when viewed from the side.
Apply hot glue generously to the bottom edges of both bottle pieces and press them firmly onto the cardboard base. Hold each piece for about 30 seconds to make sure the glue sets properly. You want a strong bond here because these pieces need to stay put once you start handling the boot for decorating. Getting the sock on properly can be tougher than you think, and I dislodged the back section that didn’t have enough glue when I tried the first time.
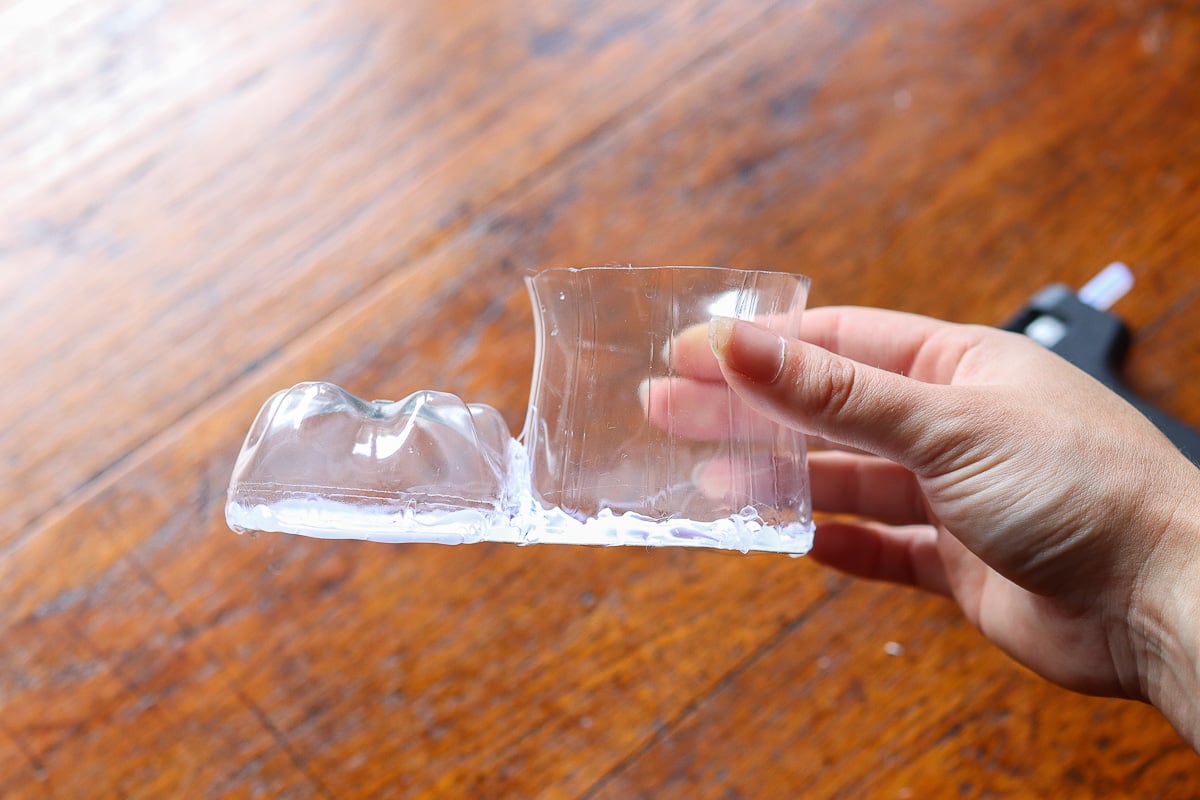
Where the two bottle pieces meet, apply a line of glue to connect them together. This reinforces the structure and keeps the boot from collapsing. Don’t worry if you can see the glue at this stage, as it’ll all be covered up by the sock in the next step. What matters is that everything feels solid and secure.
Step 4: Cover with a Sock
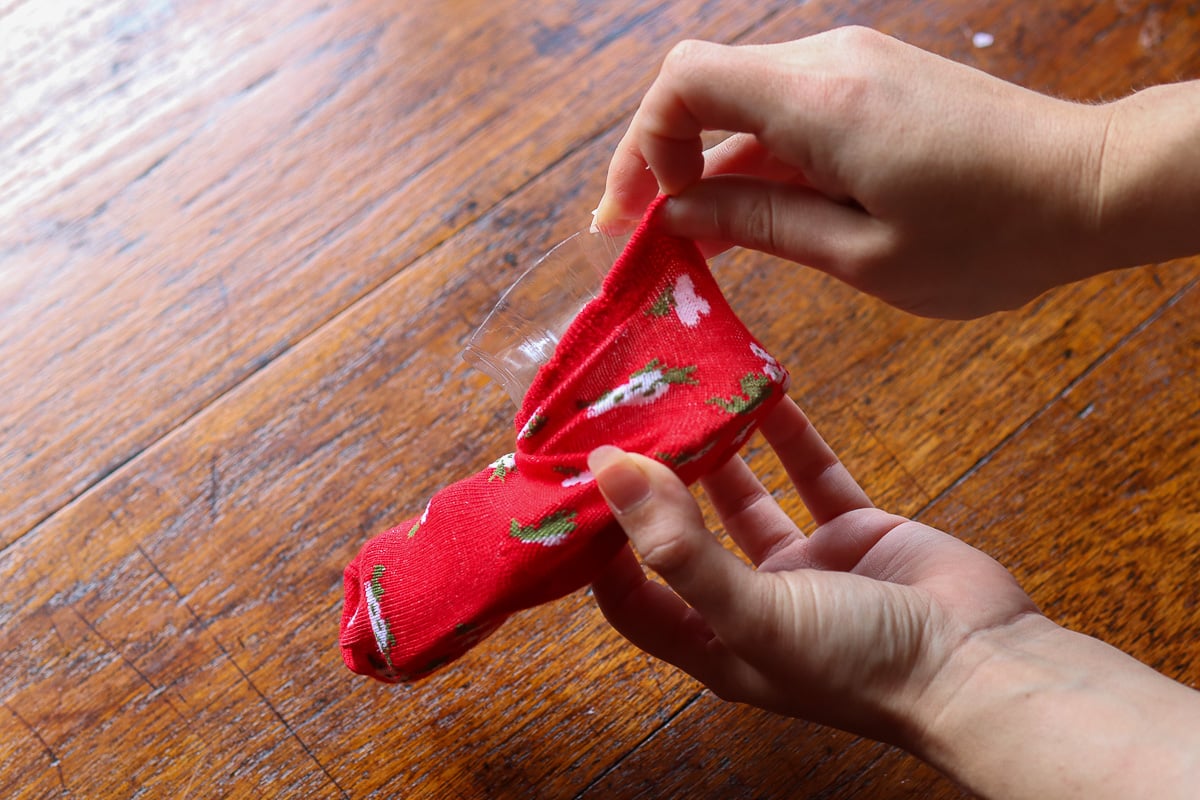
Here’s where your Christmas boot decorations go from craft project to actually looking like a decorative piece. Stretch your sock over the entire boot structure, starting from the toe area and pulling it up over the shaft. The sock should cover both the bottle pieces and wrap inside to conceal the cardboard base and the interior part of the bottle.
Getting the sock positioned correctly takes some maneuvering. You might need to adjust and smooth it several times to eliminate bunching and wrinkles. If your sock has a pattern, ensure it’s oriented the way you want it before you glue anything down. Once you’re happy with the placement, lift the edges of the sock and apply hot glue underneath to secure it to the base. If you want to reuse the socks later, you don’t have to glue them, but they may shift around while you’re decorating.
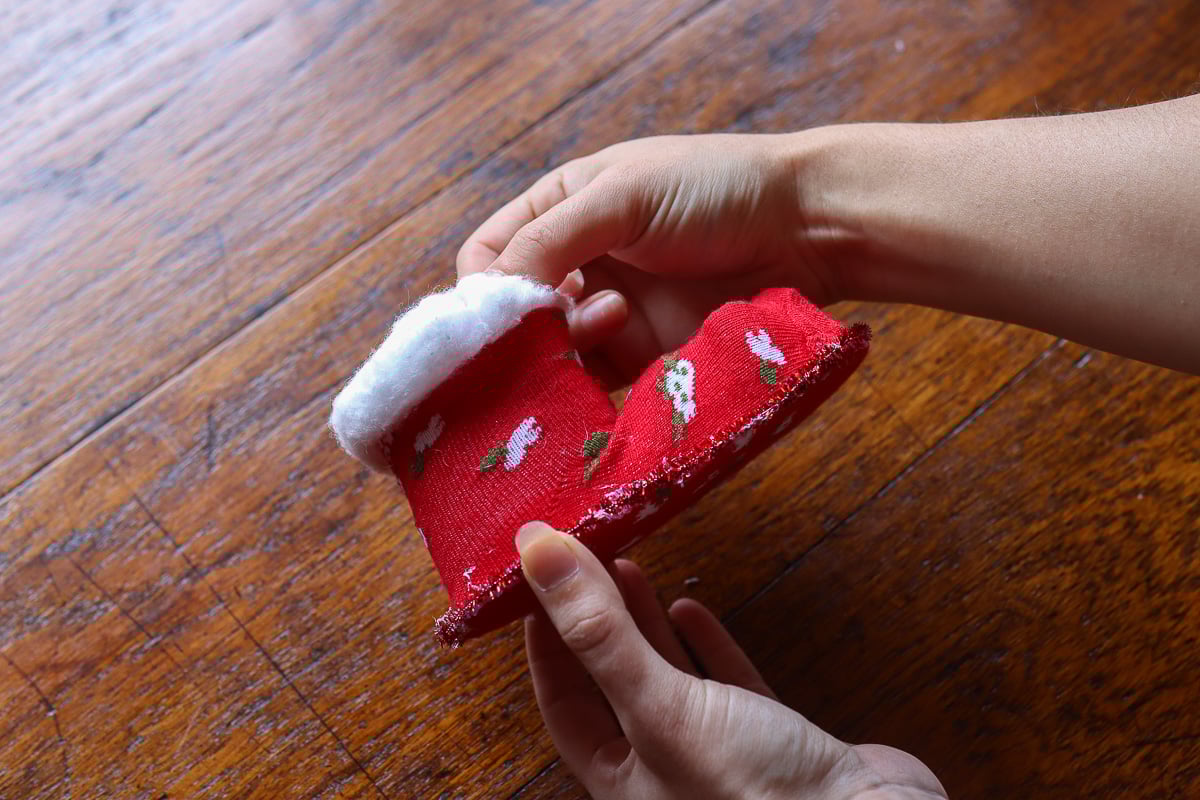
For the top of the boot shaft, fold the excess sock over the rim of the bottle piece and glue it down on the inside. This creates a clean finished edge. If there’s too much excess fabric, you can trim it before gluing, but stuffing the excess inside is usually sufficient to hide it.
Step 5: Fill and Decorate
This is the payoff after all that cutting and gluing. Your boot is built, covered, and ready to be turned into something festive. Start by deciding what you want to fill it with. This determines what other decorations you’ll add.
Greenery is a classic choice that works with any décor style. Tuck sprigs of pine, eucalyptus, or even artificial greenery into the boot, letting them spill out naturally over the top. Add some berries or small pinecones for texture. If you’re going for a candy-filled boot, arrange candy canes so they poke out visibly, maybe with some wrapped chocolates or peppermints filling in the spaces.
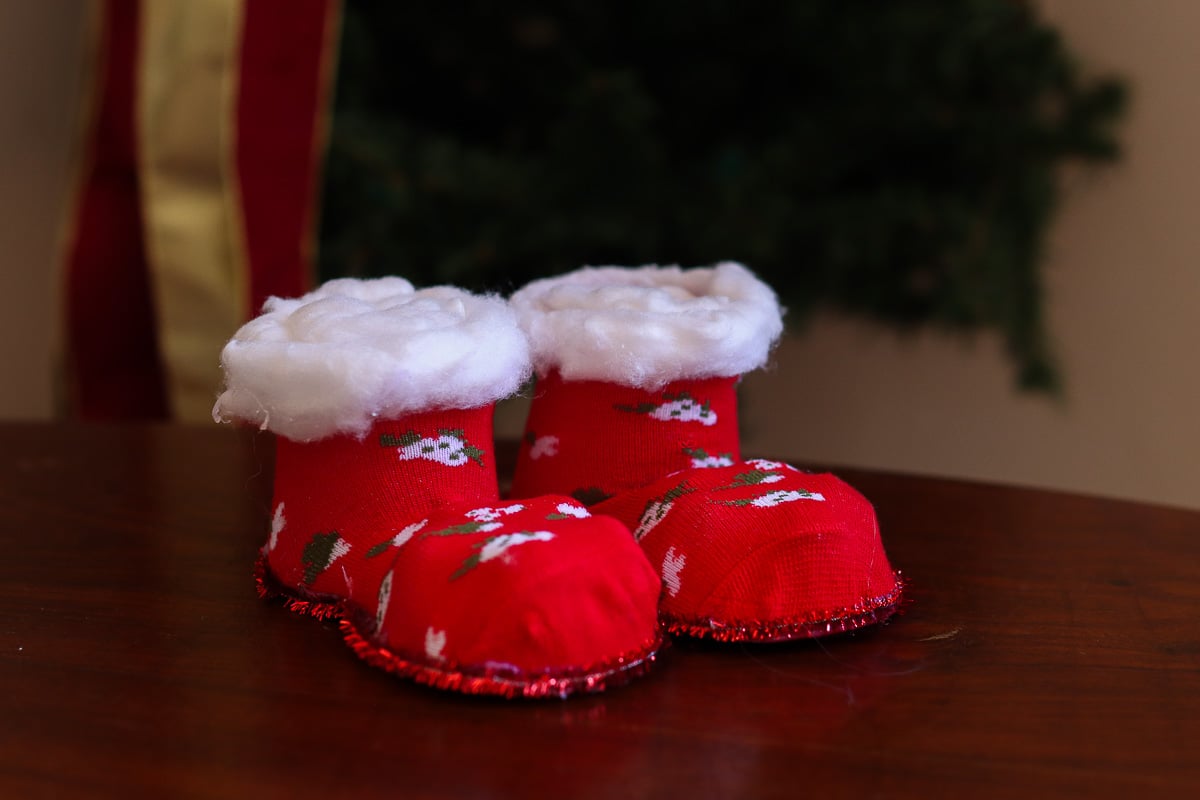
If you don’t want to fill them with specific items, cover the top with some cotton so the middle of the soda bottle is not visible. Glue the cotton to the edges so it doesn’t collapse inwards. I also added some small tinsel around the bottom to look like the base of a boot.
For embellishments, glue a ribbon bow to the front of the boot where the toe meets the shaft. You can also add jingle bells, small ornaments, or even a miniature gift tag with someone’s name on it if you’re using these as place settings or gift containers.
Step 6: Choose Your Placement
Once your boots are complete, figuring out where to put them can actually be trickier than making them. These decorations are versatile enough to work in various spots around your home, so consider what would look best in your space.
Mantel displays are a great replacement for traditional hanging stockings. Line up several boots in a row, varying the patterns and fillings to create visual interest and match each person in your home. They look great when mixed in with other Christmas decorations, such as candles, garland, or small trees.
Another spot I really like is on a console table or sideboard near your entryway. Visitors see them as soon as they enter, and filling them with fresh greenery makes your entire entry smell wonderful.
These boots also transition well into other seasons if you change up the socks and fillings. Pastel socks and spring flowers for Easter, patriotic socks and flags for July, orange socks and fall leaves for autumn, and so on. But that’s thinking ahead. For now, enjoy how unexpectedly charming a recycled soda bottle can be when you transform it into festive Christmas boot decorations.