When you go online nowadays, you probably notice artificial intelligence has infiltrated every part of the internet. No corner is safe. And yes, that includes the corner filled with Christmas crafts.
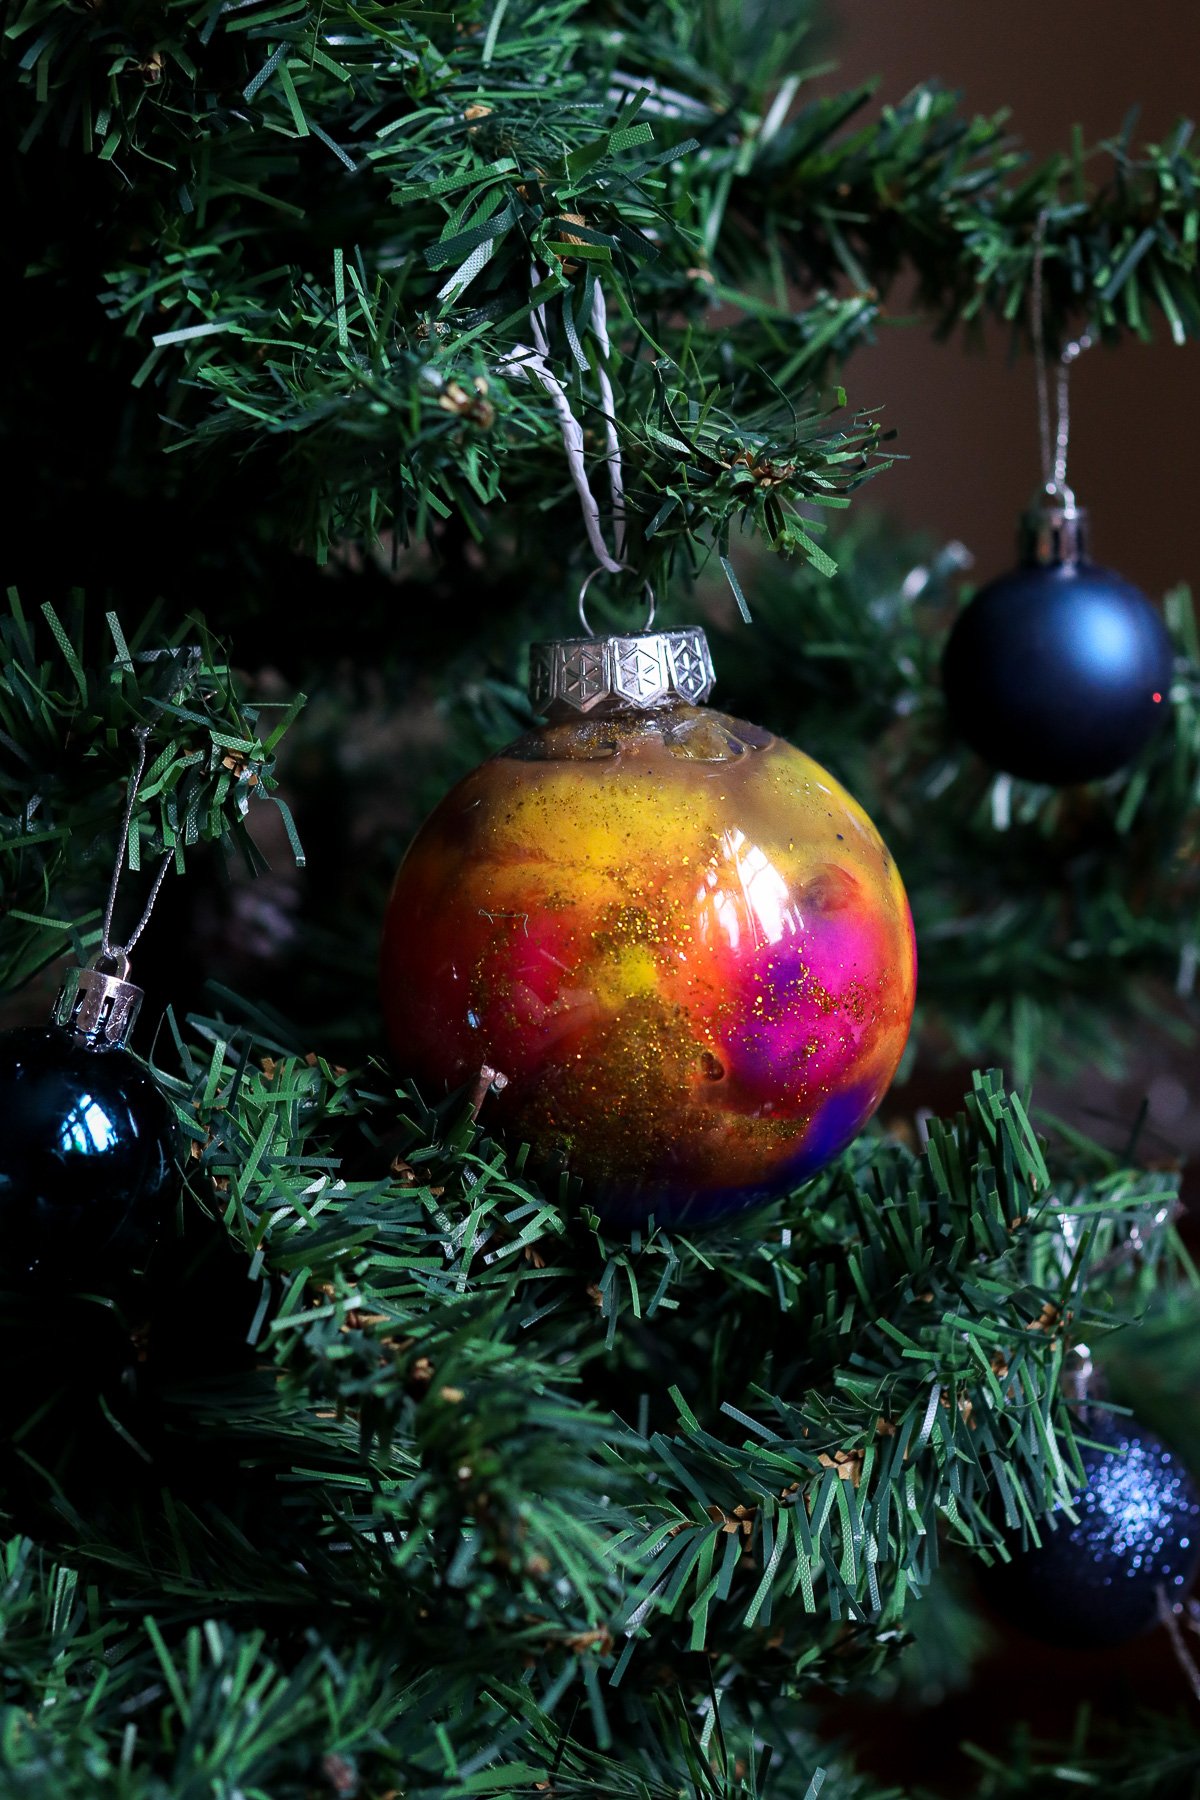
This reality was made evident to me this week when a tutorial for baking soda galaxy Christmas ornaments went viral on Facebook. The post features a video of three beautiful, shimmering ornaments, each with swirling patterns that look like actual galaxies. The tutorial for making the ornaments is in the caption, and at first glance, it seems straightforward enough.
There’s only one problem. The video is clearly made with AI.
If you didn’t spot the telltale ‘look’ that AI videos usually have, the comments also provide a clue. Many people claimed they tried the tutorial, but the result looked nothing like the video. I certainly wasn’t surprised, but it did make me wonder whether it would even be possible to replicate the beautiful ornaments the generative AI came up with.
So, going back to my days of school science experiments, I decided to put this viral galaxy ornament tutorial to the test.
I followed the AI instructions, then came up with a few alternatives to get as close as possible to that viral video.
What I ended up with is not quite what I expected.
Before We Begin…
Let’s be honest – with all the AI content floating around, it’s tough to know which DIYs and recipes you can actually trust. At Holiday Magic Hub, everything you see is made (and tested!) by real humans who love creating. Sign up for our newsletter below to get genuine holiday magic sent your way.
Testing the AI Tutorial
First, I put the viral video tutorial to the test. Although I assumed from reading the tutorial and the comments that the instructions provided wouldn’t work, I decided to try it anyway to establish a control. You know, for science.
This required clear, fillable ornaments (as most of these DIYs do), baking soda, acrylic paint, and glitter. The instructions, seemingly also written by AI, were as follows:
- Prepare the Ornaments: Remove the tops of your clear ornaments and make sure they’re clean and dry inside.
- Create the Base: Add 1–2 teaspoons of baking soda inside each ornament. This gives your paint a soft, cloudy texture when it mixes.
- Add Paint: Squeeze a few drops of each paint color into the ornament — black for depth, blue and purple for spacey tones, and a touch of pink or gold for highlights.
- Shake or Swirl: Seal the top with your thumb and shake gently (or slowly swirl) to mix the colors. Watch as the paint and baking soda form beautiful marbled galaxy patterns.
- Add Glitter: Sprinkle in a pinch of fine glitter and swirl again to let it catch the light like tiny stars.
- Let It Dry: Leave the ornament open for a few hours to dry completely before putting the top back on.
- Display: Add a string or ribbon and hang your galaxy ornament in a bright spot or on your tree.
The Process
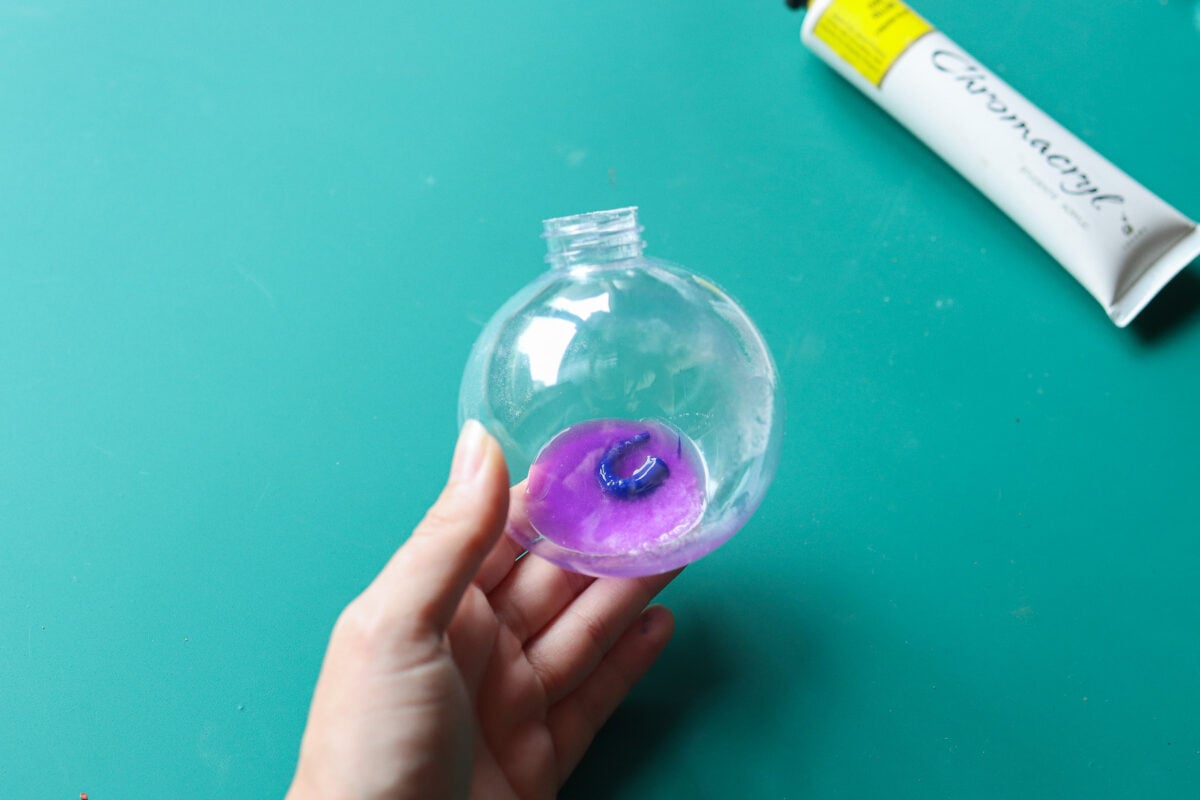
Following these steps, I started by filling the bottom with baking soda. I didn’t think this would give the paint the “soft, cloudy texture” as described, but I stuck to the one-teaspoon measurement anyway. Already, I could tell this wasn’t going to go as planned.
Then I ran into my first real hurdle. The caption listed acrylic paint as the medium, but acrylic paint is quite thick, and it definitely doesn’t “swirl” when mixed with baking soda. (Later, I realized it probably meant acrylic craft paint, which is runnier.) I did squeeze some into the ornament as instructed (the blue blob seen in the picture above), but quickly realized I needed to adjust. I decided to mix some of the other colors with a few drops of water to thin them out a little, hoping that would help them blend better.
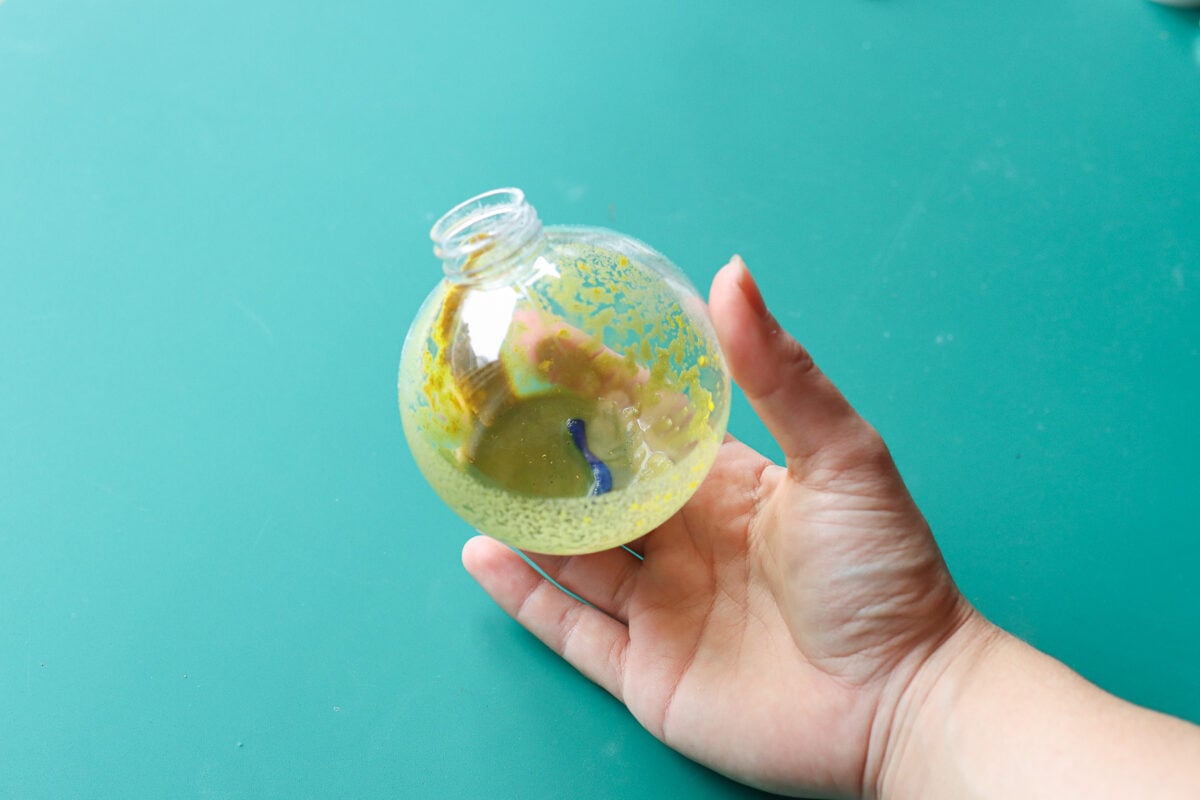
Sadly, not even that helped. Problem one was that when the paints were the right viscosity to swirl, they quickly mixed together, creating an unappealing shade of yellow-brown throughout the ornament. No swirls in sight.
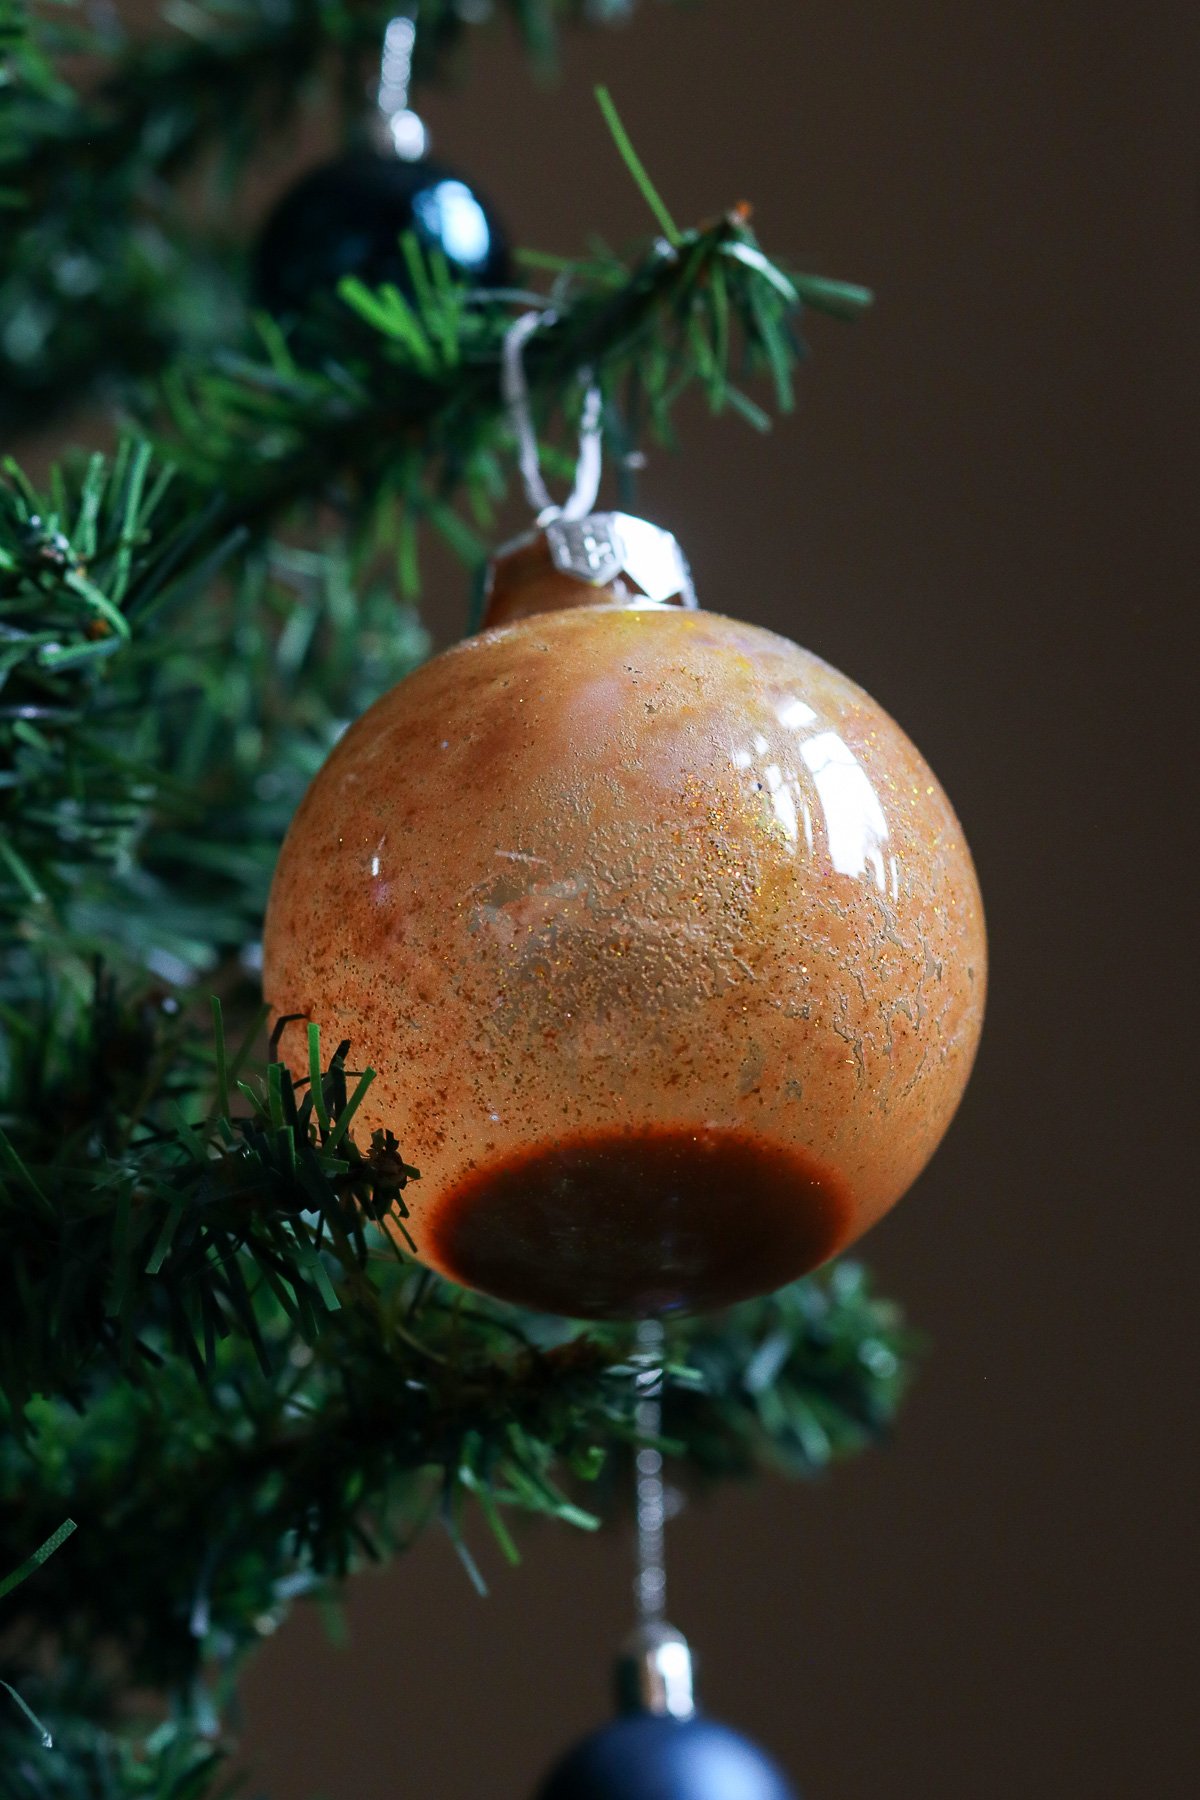
Problem two was that the baking soda pulled any paint that might stick to the sides down to the bottom of the galaxy ornament, where it became a puddle. The baking soda acted like a weight, dragging everything down into a murky pool. I could have poured out the excess, but since that wasn’t part of the tutorial, I decided to leave it as is to see the true result of following the AI instructions.
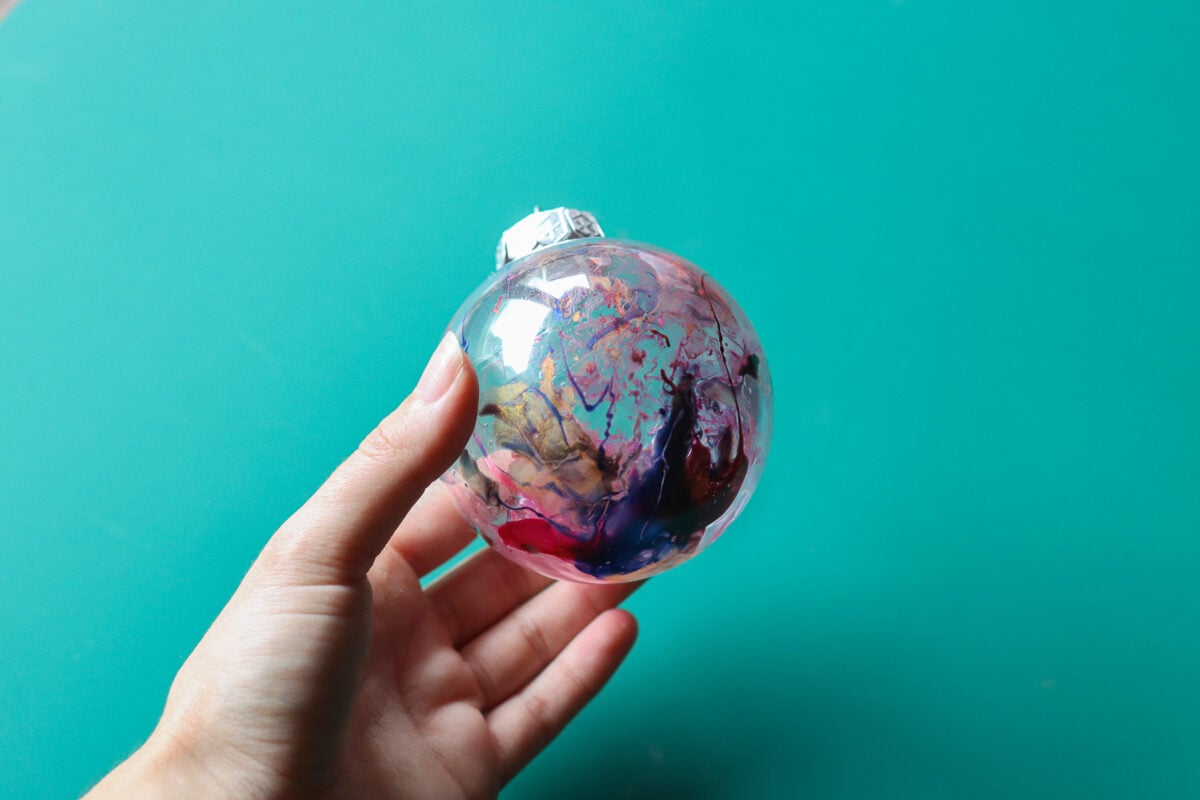
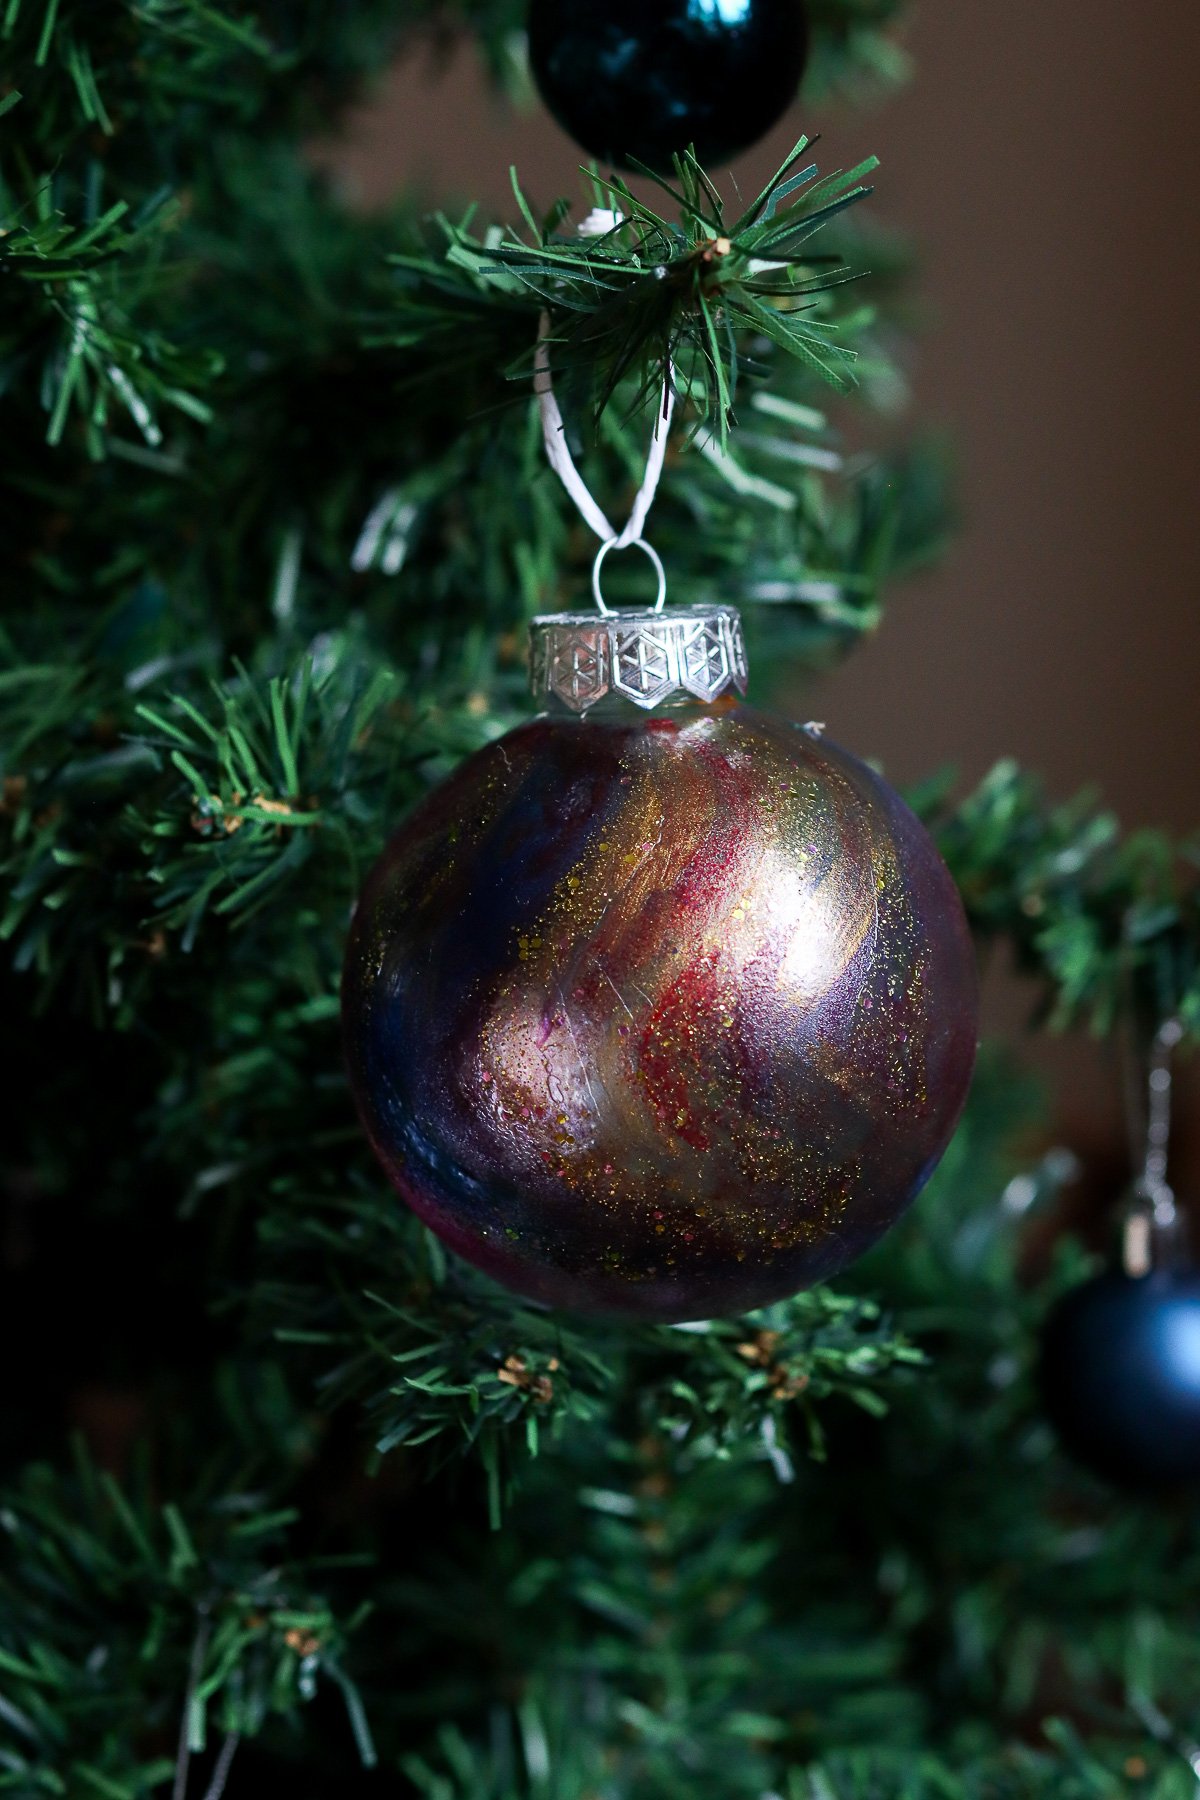
The Result
This ornament not only looks nothing like the AI video, but it doesn’t look like a galaxy at all. To be honest, I think it looks pretty unappealing. The colors are muddy, there’s no dimension or depth, and the whole thing just looks like a failed science experiment.
- Video Match: 1/10
- Galaxy Match: 2/10
- Overall Appeal: 1/10
Experiment 1: Ink Paint
Next, I came up with a few ways to better replicate the video’s result than the AI tutorial did. Because of the swirling and mixing aspect, my first thought was ink paints. You only need a few drops for vivid color, and they have that opaque look that matches the video well. Plus, inks naturally want to blend and swirl in interesting ways.
I knew getting the ink paints to dry correctly would be a challenge with plastic ornaments. Creating the same exact swirls as the video would also be pretty impossible. But I did think the effect would look more like a galaxy than the first tutorial I tried, so it was worth experimenting with.
The Process
To test whether the ink paints would dry on the outside of a clear ornament, I sprayed a mix of galaxy-like colors on the exterior and left them for a few hours. The resulting pattern was not great, and nothing like a galaxy, so I moved on to plan B—filling the ornaments with a few drops of paint instead.
To do this, I used a combination of alcohol-based inks and acrylic-based inks so they wouldn’t mix too quickly. I used pink, orange, green, and yellow inks to try to match the colors of the first ornament in the AI video. The variety of colors gave me a chance to see how different hues would interact inside the clear sphere. I also added some gold glitter for a bit of texture and that starry effect.

After swirling, I poured out some of the excess ink and left the top off to allow the paint to dry. This step took longer than I expected – several hours, in fact. Although it didn’t all dry completely even after waiting, it did create a pretty pattern on the inside that was slightly opaque, which was much more successful than the thick acrylic paint from the AI tutorial.
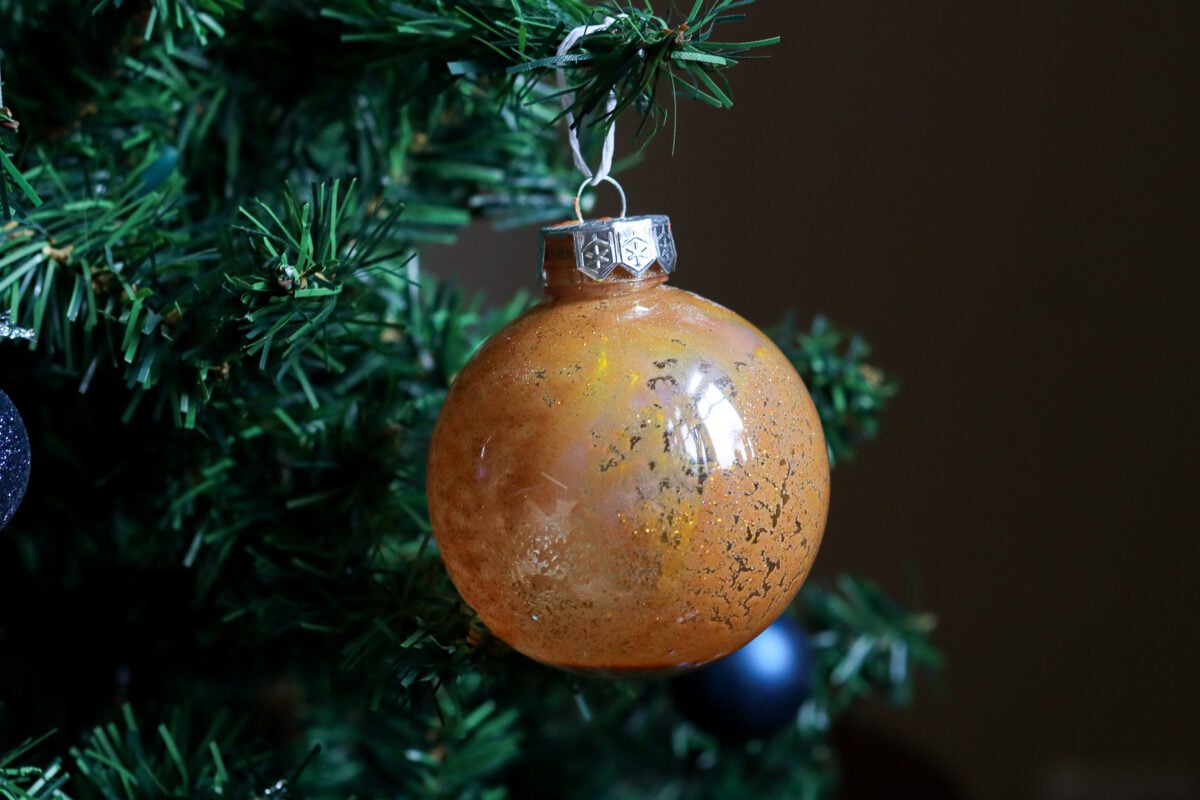
The Result
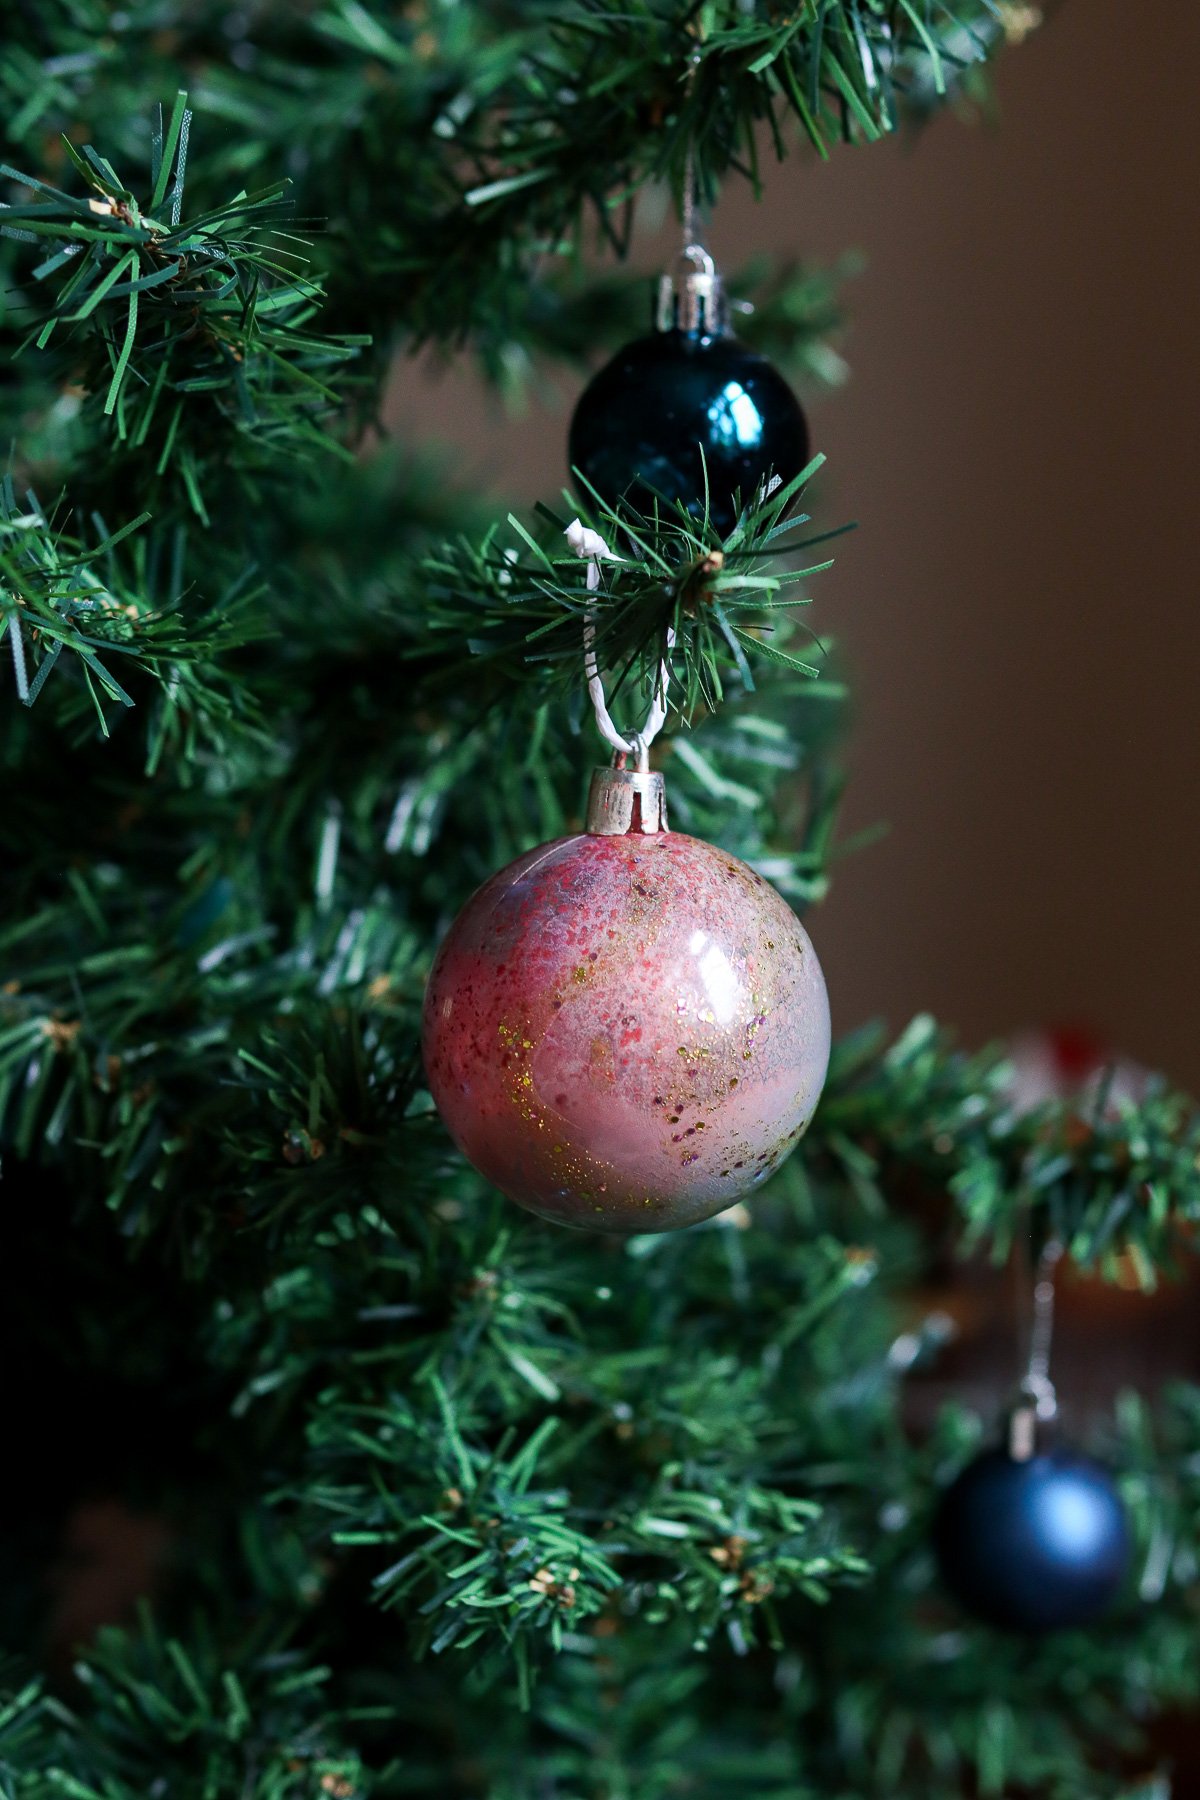
I think these ornaments are pretty and do look like a galaxy, but they don’t really match the video result. The colors are more vibrant and less blended than those generated by the AI.
With a few drops of ink on the inside, it is fun to swirl and make different patterns, so your ‘galaxy’ is always changing as it spins. That’s actually a nice feature, and the ornament becomes interactive in a way. Darker inks like purples, blues, and blacks will probably produce a better result and look more like deep space.
- Video Match: 1/10
- Galaxy Match: 5/10
- Overall Appeal: 7/10
Experiment 2: Nail Polish
For experiment number two, I took a few tips from the video commenters. A few mentioned trying nail polish instead of acrylic paints, which was quite intriguing. I have to admit, I was skeptical at first, as I didn’t think it would completely solve the problems with the original tutorial.
While I remained uncertain about the outcome, I will say that finding the right colors when you work with nail polish rather than paint is much simpler. It was so easy to find vivid galaxy-like colors that had a shimmer or glitter finish.
Many people have a collection of nail polish already, so you might not even need to buy anything new. Plus, the runny but thick texture is perfect for swirling, at least in theory.
The Process
I assumed that the commenters on this video were recommending adding drops of nail polish to the inside of the ornament, as in the original tutorial. However, that did not end well.
Although I worked quickly, the polish dried way too fast, and adding drops of clear polish didn’t help them mix well. I ended up with a blob of partially-dried polish on the bottom instead of the beautiful swirls I was hoping for. Another failed attempt.
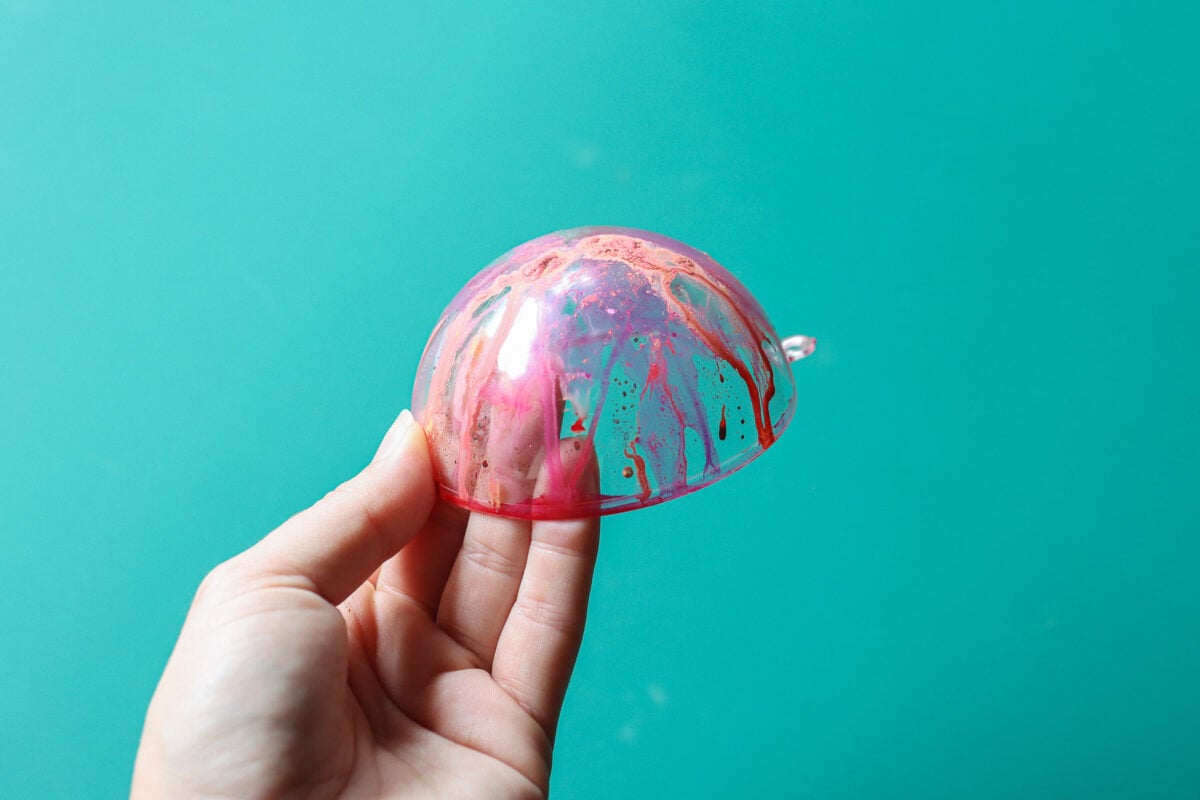
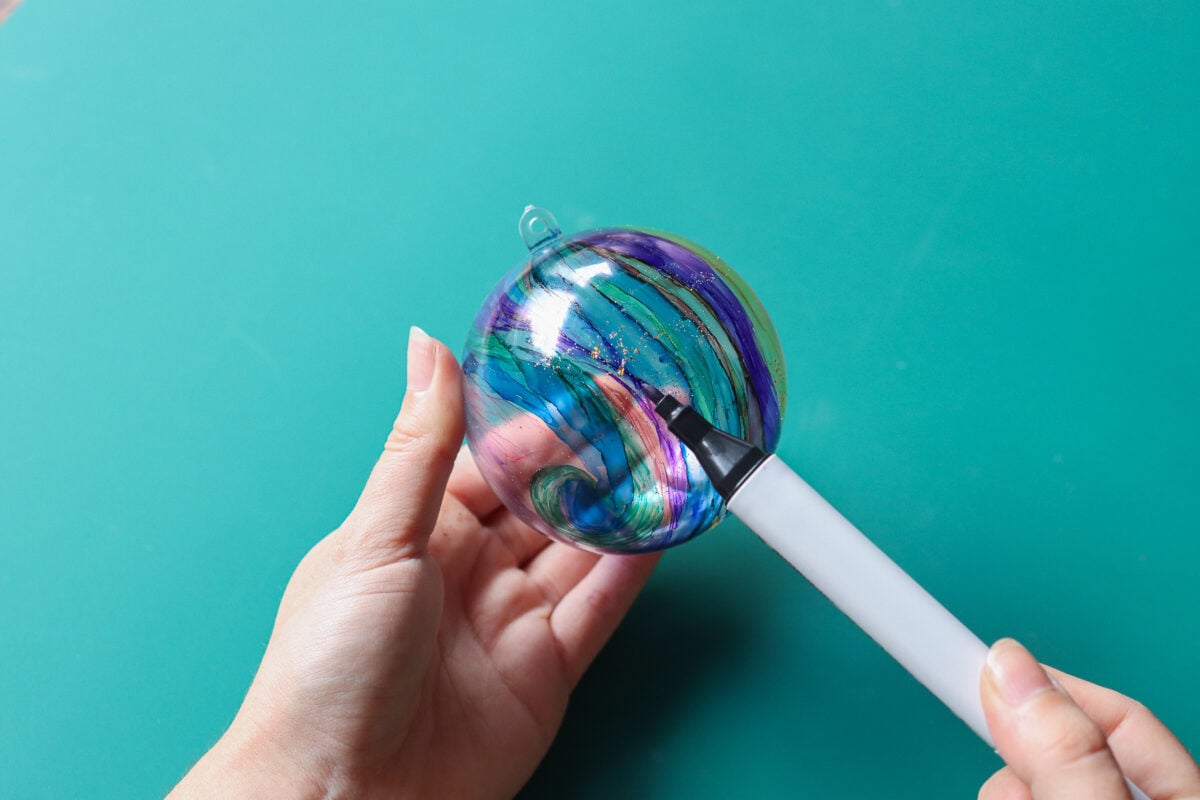
Luckily, I had another trick up my sleeve. I’m quite an avid nail painter, and have painted my own galaxy nails before by blending colors with a sponge. So rather than filling a clear ornament, I decided to use a kitchen sponge to paint with the polish on the outside. This technique had worked well on my nails, so why not on ornaments?
Starting with dark blue, I painted a swirl on the exterior in a pattern similar to the video and blended it out with a sponge. Thinning out the nail polish this way made it more opaque, too, and created a better ‘galaxy’ texture than painting the polish straight on.
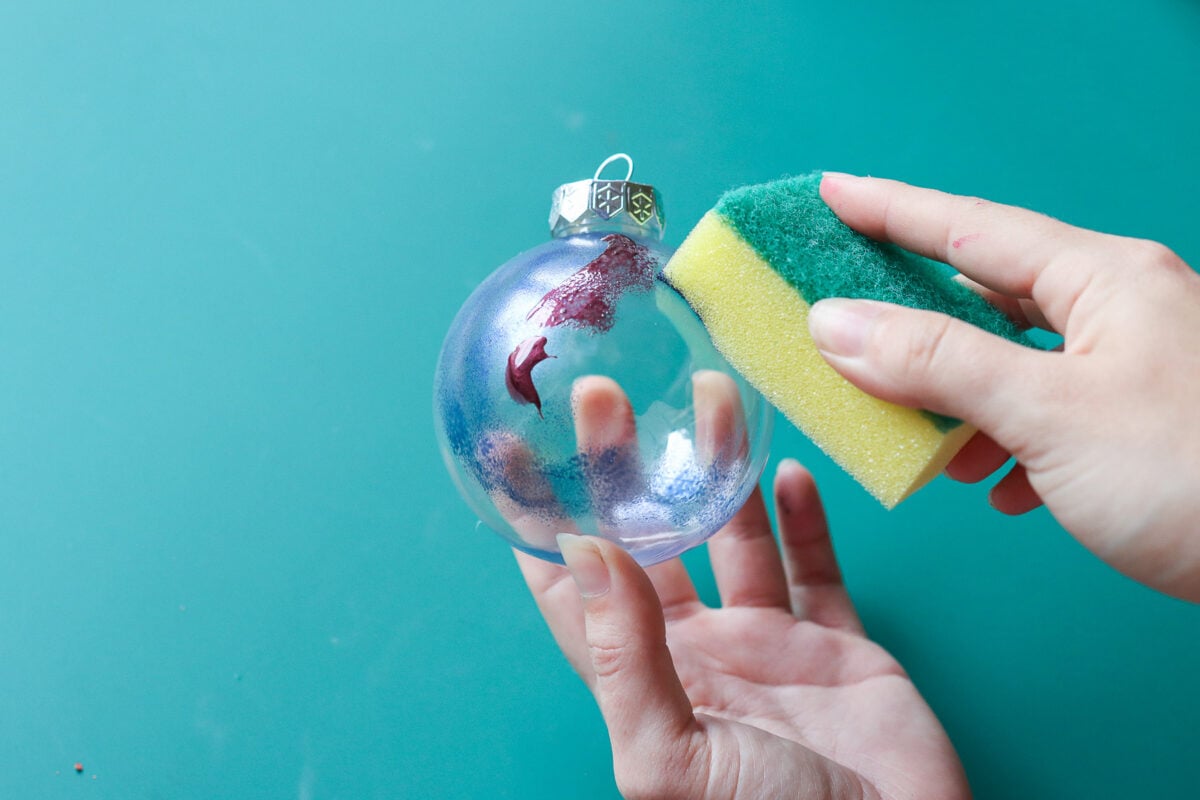
The sponge is key here. It softens the edges and creates that nebula-like effect. After blue, I blended in some purple, gold, and pink, following the same swirling pattern and working quickly before each layer dried.
The nail polish dries incredibly quickly, so it was easy to work with and didn’t make a mess. I was able to hang it almost immediately without it being tacky on the outside. This was a huge advantage over the other methods that required more drying time.
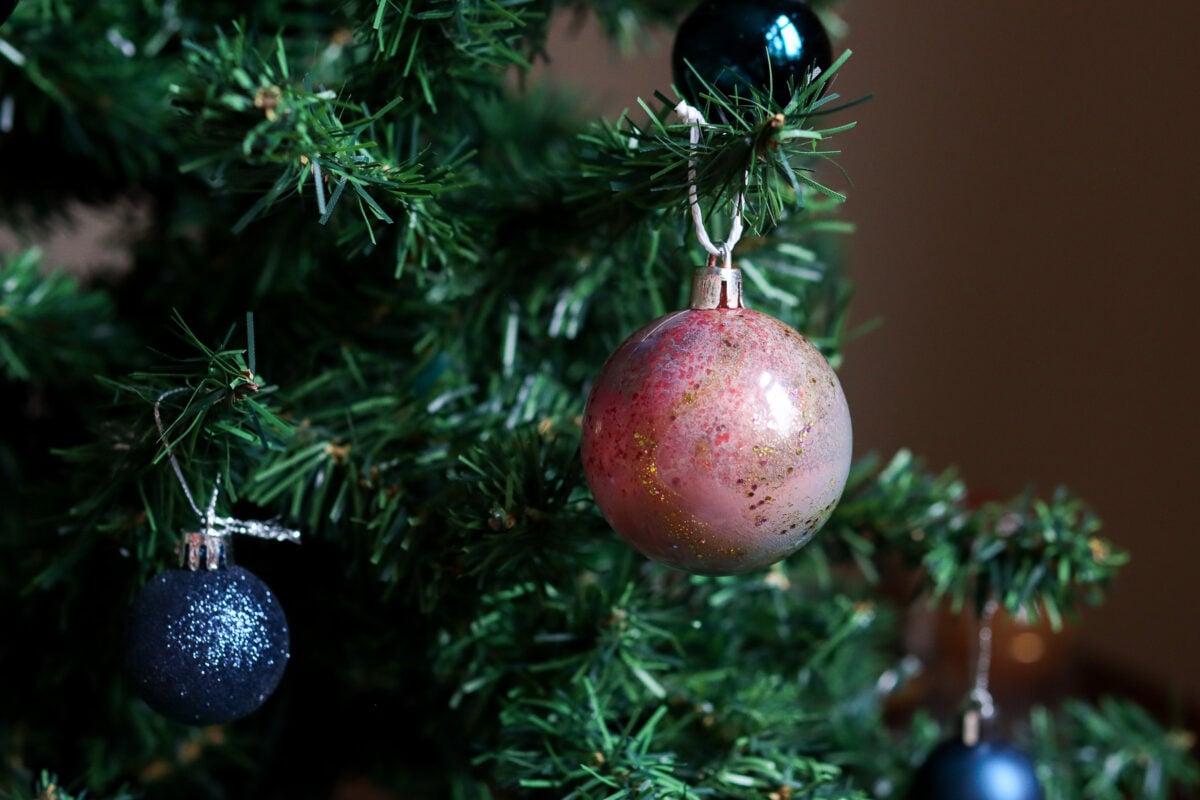
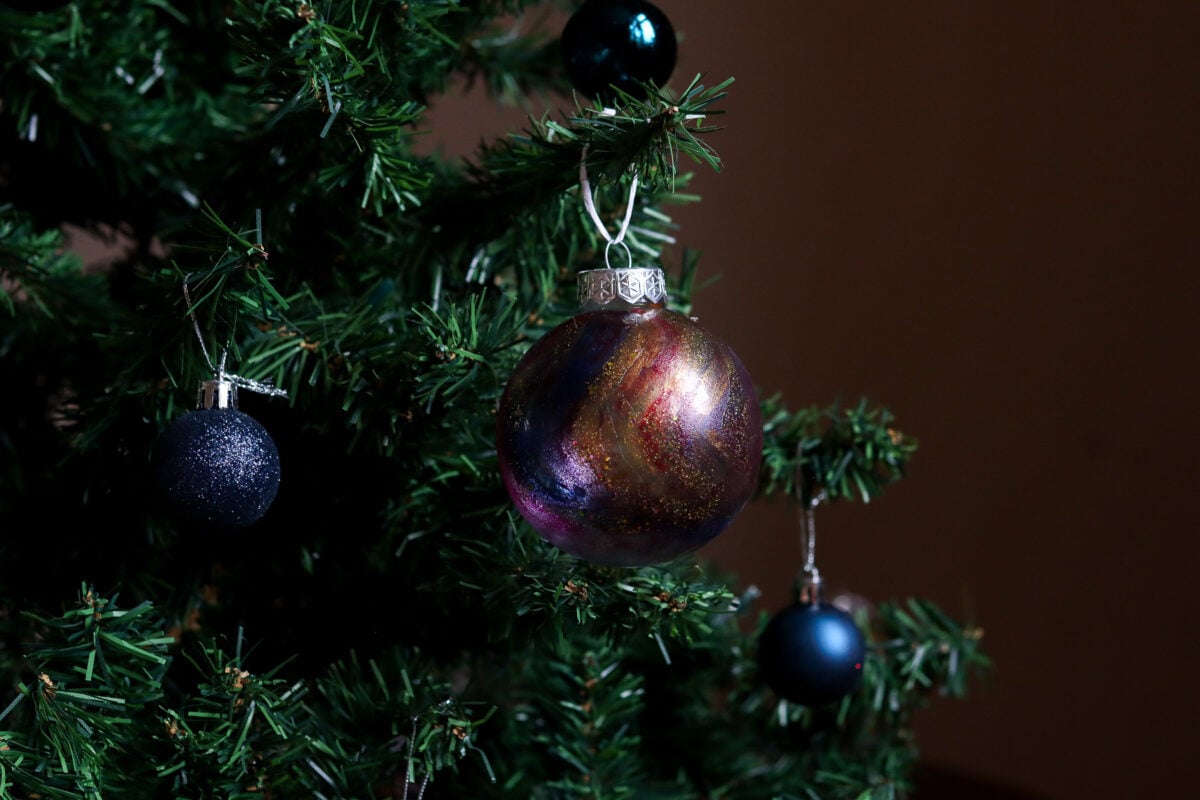
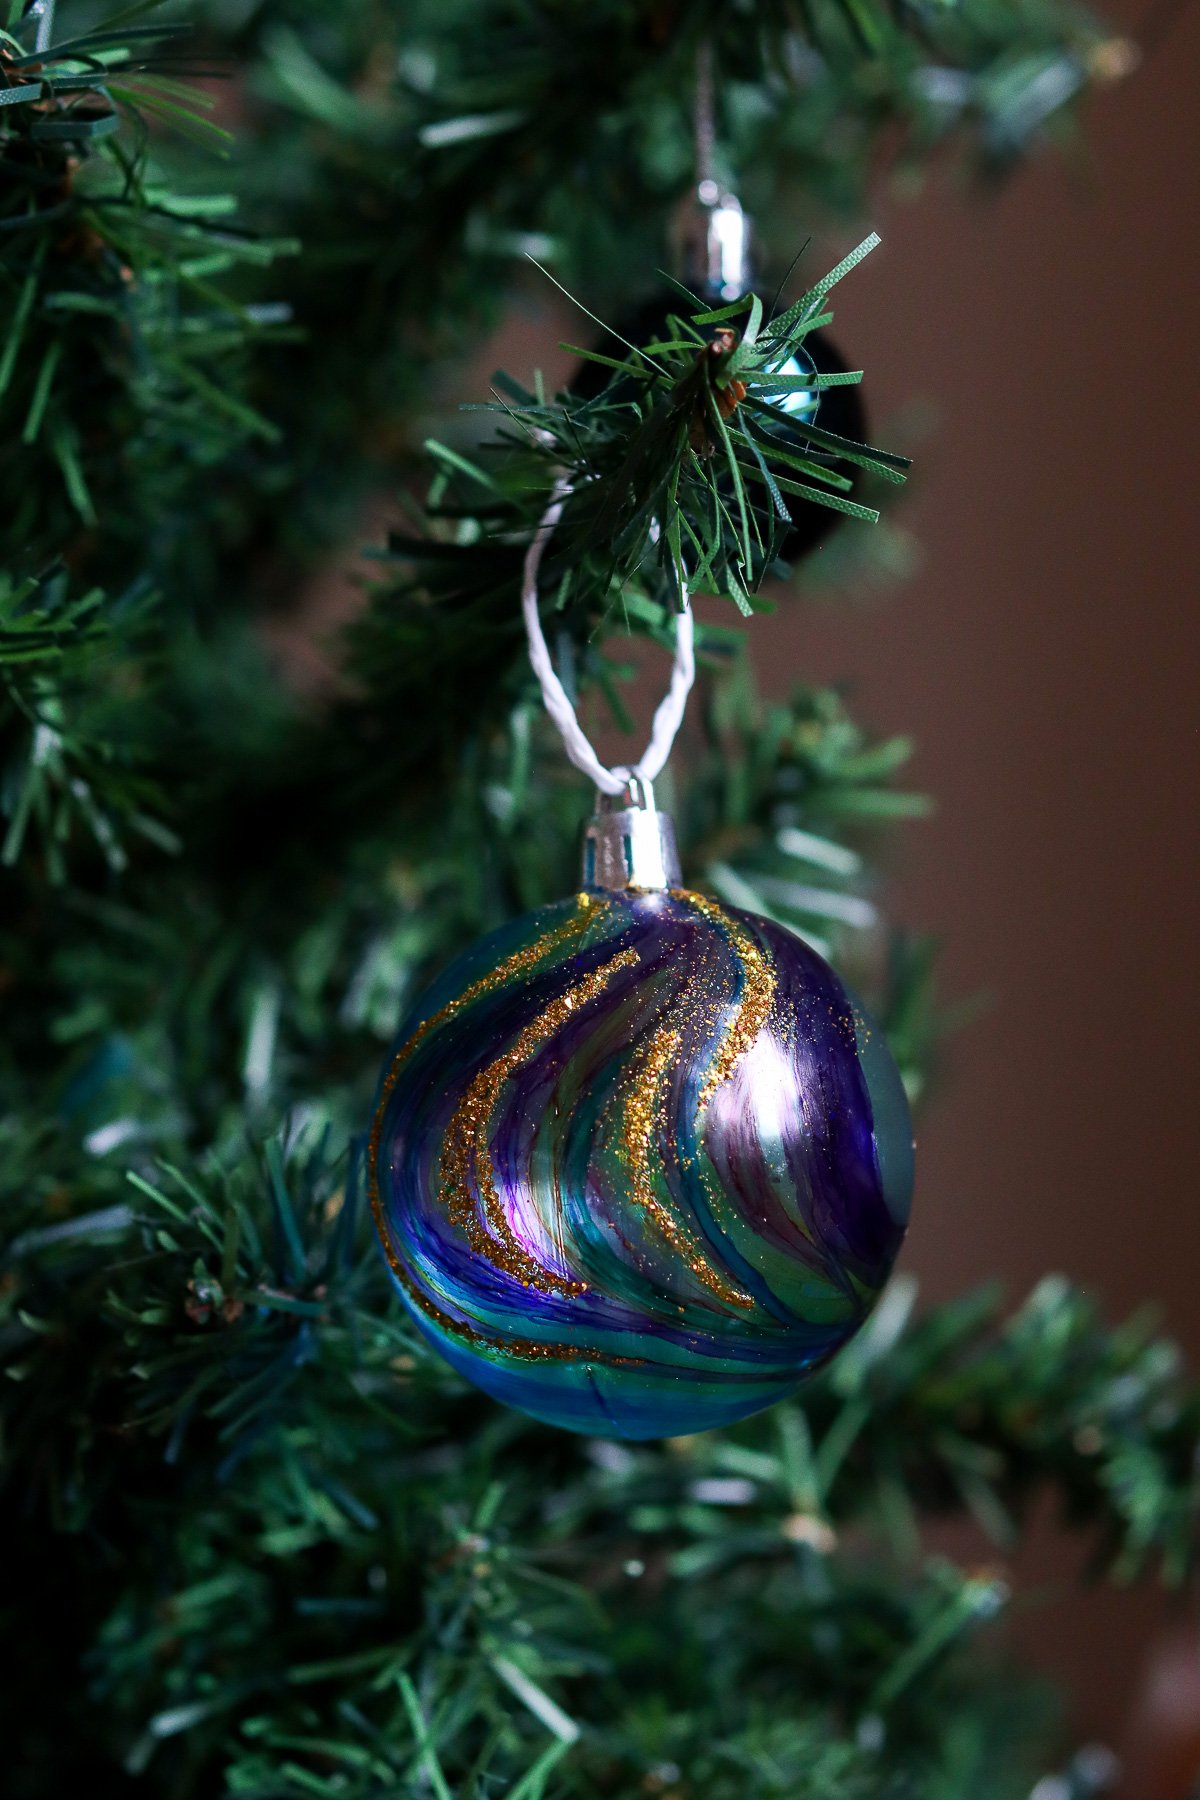
The Result
I love this ornament and think it blends the best of all the experiments. The colors are bright and eye-catching, but still opaque enough to match the video. It was also easy to recreate the same pattern, which means you could make a whole set that looks cohesive.
The only downside is that the final sheen is not quite as glossy as the ornaments in the video. The nail polish finish is slightly more matte than what the AI generated, though it still catches light nicely. You could spray the finished ornament with a clear coat to seal it and give it a nice shine.
- Video Match: 7/10
- Galaxy Match: 8/10
- Overall Appeal: 8/10
Experiment 3: Markers
The first two experiments were top of mind, but then I glanced over to my art and craft shelf and noticed a box of markers. On a whim, I did a quick test to see if the color would stick on or rub off the plastic ornament. And to my delight, the color stuck perfectly. I used alcohol-based markers. (These are the ones I have.)
Markers definitely don’t provide the same finish as paint, but they do offer more control. I was able to match the pattern from the AI video quite closely by simply drawing it on. It only took a couple of minutes and made no mess, at least not until I decided to introduce the glitter. This was by far the fastest method I tried.
The Process
This process couldn’t be simpler: draw a galaxy pattern on the outside of a clear ornament with markers. That’s it. Darker colors show up better than the lighter ones, so it’s better to stick with blues, reds, purples, and pinks. Yellow and orange work, but they aren’t as vivid and tend to look a bit washed out on the clear surface.
The concern with this DIY is ruining your markers. If you blend any colors in the pattern, they will transfer and affect the marker tips. You can avoid this by drawing carefully and not overlapping wet colors, but the lack of blending does make the ornament less galaxy-like. It ends up looking more graphic and deliberate rather than naturally swirled.
To create a shimmery effect like the AI video, I swirled some glue in line with the pattern and sprinkled some gold glitter over the top. This last step really brought the ornament to life and added that sparkly, starry dimension that makes it feel more festive. The glitter catches the light beautifully when the ornament hangs on the tree.
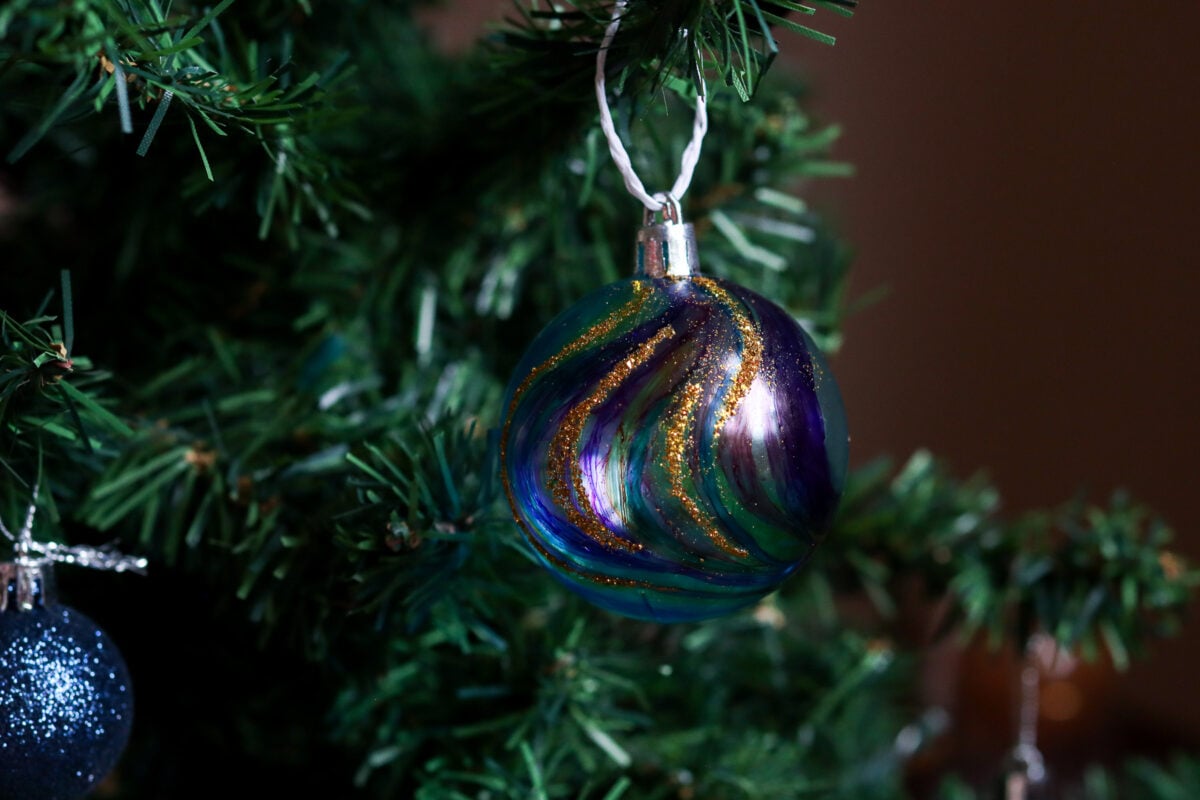
The Result
This was the most unexpected result, and probably my favorite one overall. They look remarkably similar to the tutorial in pattern and sheen, but maybe aren’t quite as vivid. The colors are slightly more muted than the AI version.
The only disappointment is that the marker lines are visible up close. You can see the individual strokes if you’re really looking. However, from far away, hanging on your tree, you won’t really notice. And let’s be honest, nobody’s examining your ornaments from inches away anyway.
- Video Match: 9/10
- Galaxy Match: 7/10
- Overall Appeal: 9/10
Experiment 4: Paint and Cotton Balls
For the final experiment, I turned to Google. Instead of focusing on recreating the result of the AI video, I looked for a tutorial that would look the most like a real galaxy. Some were similar to the experiments I had already tried, but one video was quite different from the others and caught my attention immediately.
This DIY also used acrylic paint, but watered down instead of used straight from the tube. Glitter is another shared element with the AI tutorial. Finally, cotton balls are used to fill the ornament and bring everything together, which seemed like an unusual addition but was intriguing enough to try.
The Process
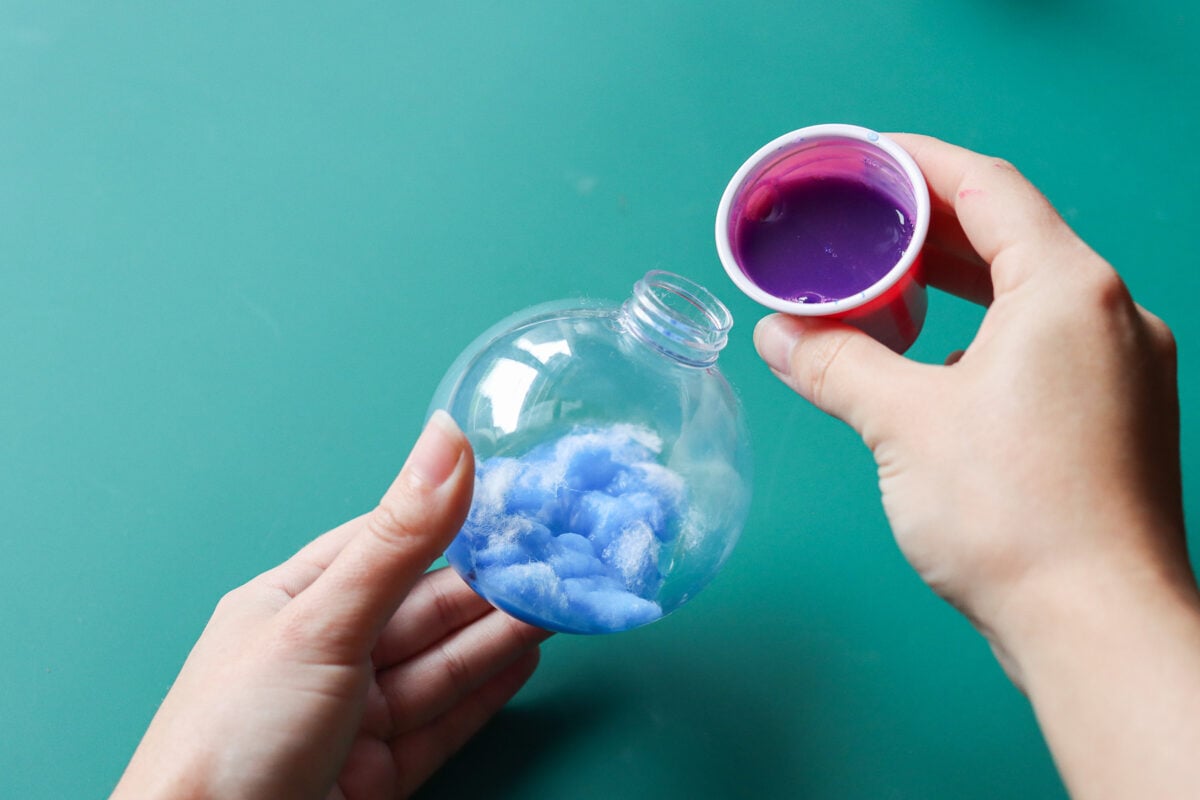
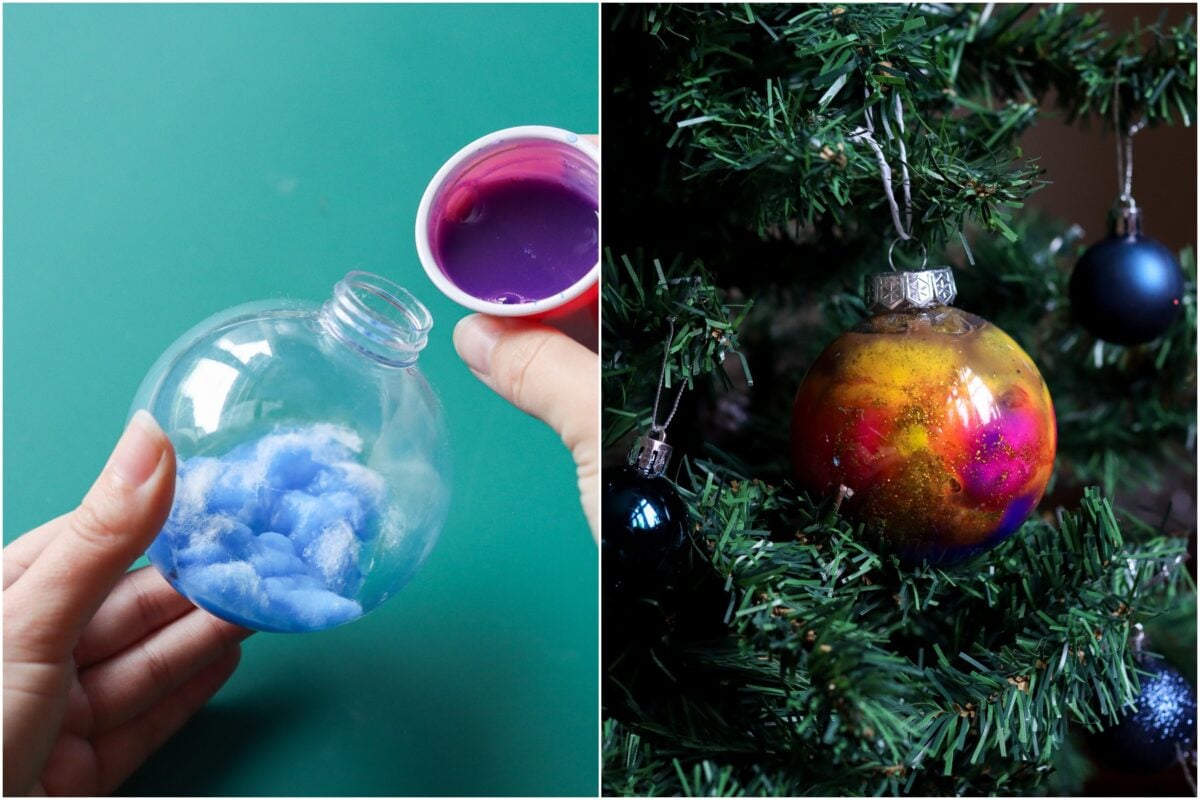
I started by mixing my colors with some water to thin them out significantly. To match the other experiments and keep things consistent, I stuck with purple, blue, pink, and yellow. The paint needed to be quite watery (almost like a wash) to work properly with this method.
I opened the top of the clear ornament and poured in a layer of the thinned blue acrylic paint, letting it coat the bottom. Then, I added cotton balls to the bottom to soak up the paint. This may seem like an unnecessary step, but it is absolutely essential, as it stops the paint layers from mixing and turning the entire ornament brown. The cotton balls act as a barrier between colors.
Next, a layer of glitter on top. I held the ornament at an angle to spread the glitter as evenly as possible, rotating it to make sure the sparkle was distributed throughout the layer. This creates that starry effect between color layers.

On top of that goes the next color, which was purple. More cotton balls absorb the watery paint and separate the layers, maintaining the distinct color bands. The same process continues until the ornament is completely filled.
I used the back of a spoon to press down each layer and to add some more swirls at the end once all the layers were in place. This pressing motion helps the layers settle and creates some interesting color blending at the edges.
Finally, if your clear ornament lid doesn’t hold well (or your tree is in a high-traffic area), hot glue the top to seal it closed so none of the liquid comes out. Trust me on this one. You don’t want watery paint leaking onto your tree or carpet.
The Result

I think these ornaments are beautiful and incredibly vivid. They definitely stand out the most on the tree of all the experiments. The layered effect creates genuine depth that the other methods couldn’t achieve. The colors also blend in interesting ways at the borders between layers, and the glitter inside looks like little stars scattered throughout the galaxy.
The only downside is the weight. These ornaments become quite heavy when filled with water-soaked cotton balls. You’ll want to hang them on sturdier branches closer to the trunk of your tree rather than on delicate outer branches. They’re also not ideal if you have cats or kids who might knock ornaments around, since they could potentially spring a leak.
- Video Match: 5/10
- Galaxy Match: 9/10
- Overall Appeal: 8/10
Which Worked the Best?
I have a few takeaways from trying to recreate the viral galaxy ornaments. The AI tutorial was definitely the worst of the bunch, producing muddy colors and no recognizable galaxy pattern whatsoever. It was incredibly difficult to create the same effect as in the AI video with any other materials, which is understandable, as AI can generate images that aren’t bound by the laws of physics or the limitations of real materials.
Of the other options, the markers were closest to the video in terms of matching the pattern and overall look. But if you want something that actually looks like a real galaxy with depth and dimension, the paint and cotton ball method had the best effect.
Ultimately, I loved all the experiments I tried and think they all look great in their own way. Each method has its advantages depending on what you’re going for. The best part is you can pick your favorite look, or choose which one to follow based on what you already have at home. Just make sure you skip the AI one, as you’re bound to be disappointed.
Want more Christmas crafts and decor ideas from real humans? Subscribe to our newsletter here to have our best ideas sent directly to your inbox.