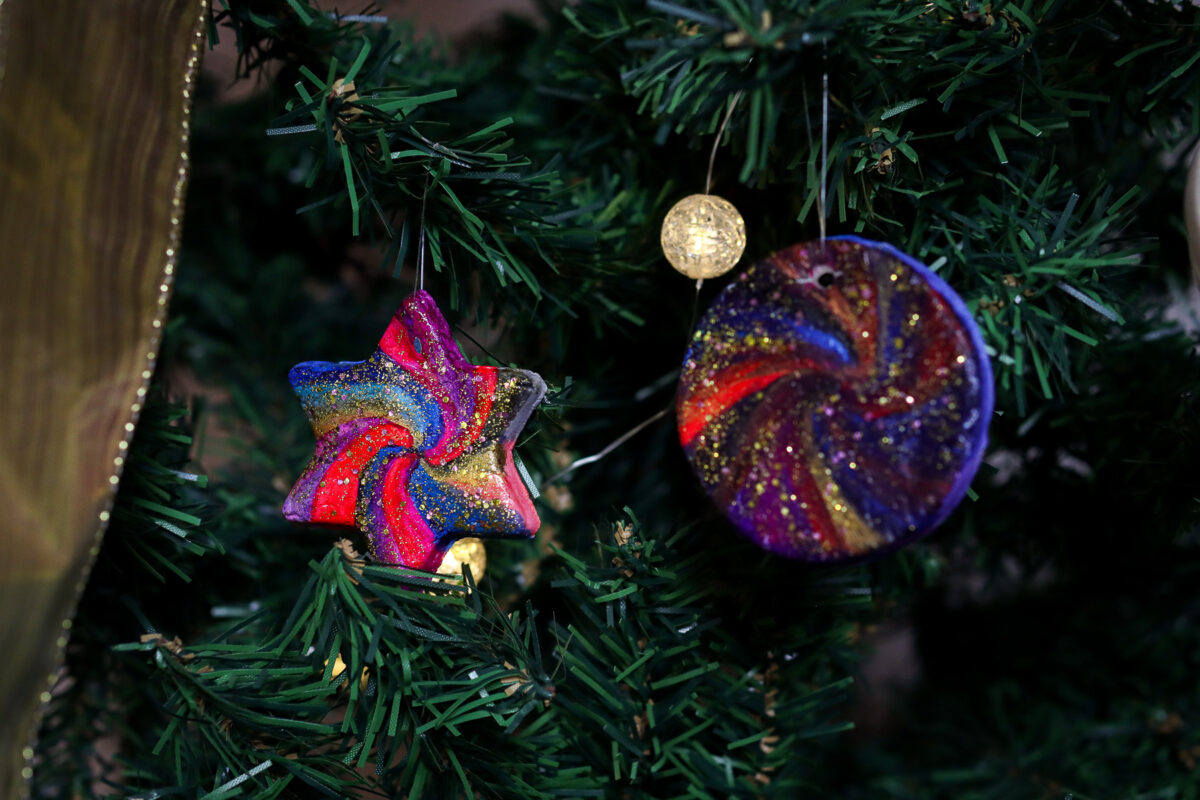
Baking soda ornaments are one of my favorite holiday DIYs. They are so easy to make and really don’t take a lot of time for the impressive result you get at the end. They’re also incredibly customizable, which is why this year, I thought I’d hop on the celestial Christmas trend and make galaxy-themed ones.
The smooth, white surface of dried baking soda dough turns out to be the perfect canvas for painting swirling nebulae and starry skies. I recently made spherical galaxy ornaments using clear, fillable baubles, but dare I say that these were a little more fun, simpler, and less messy to make.
The baking soda creates galaxy ornaments that almost resemble those made of porcelain or clay. They feel substantial and fancier than they are to make. And because you’re making them from scratch, you can control the size, shape, and design completely.
The process itself is straightforward. Nothing complicated, but the drying time means this isn’t always a same-day project, unless you’re willing to use the oven. Plan to start these at least a day or two before you want to hang them on your tree.
What You’ll Need
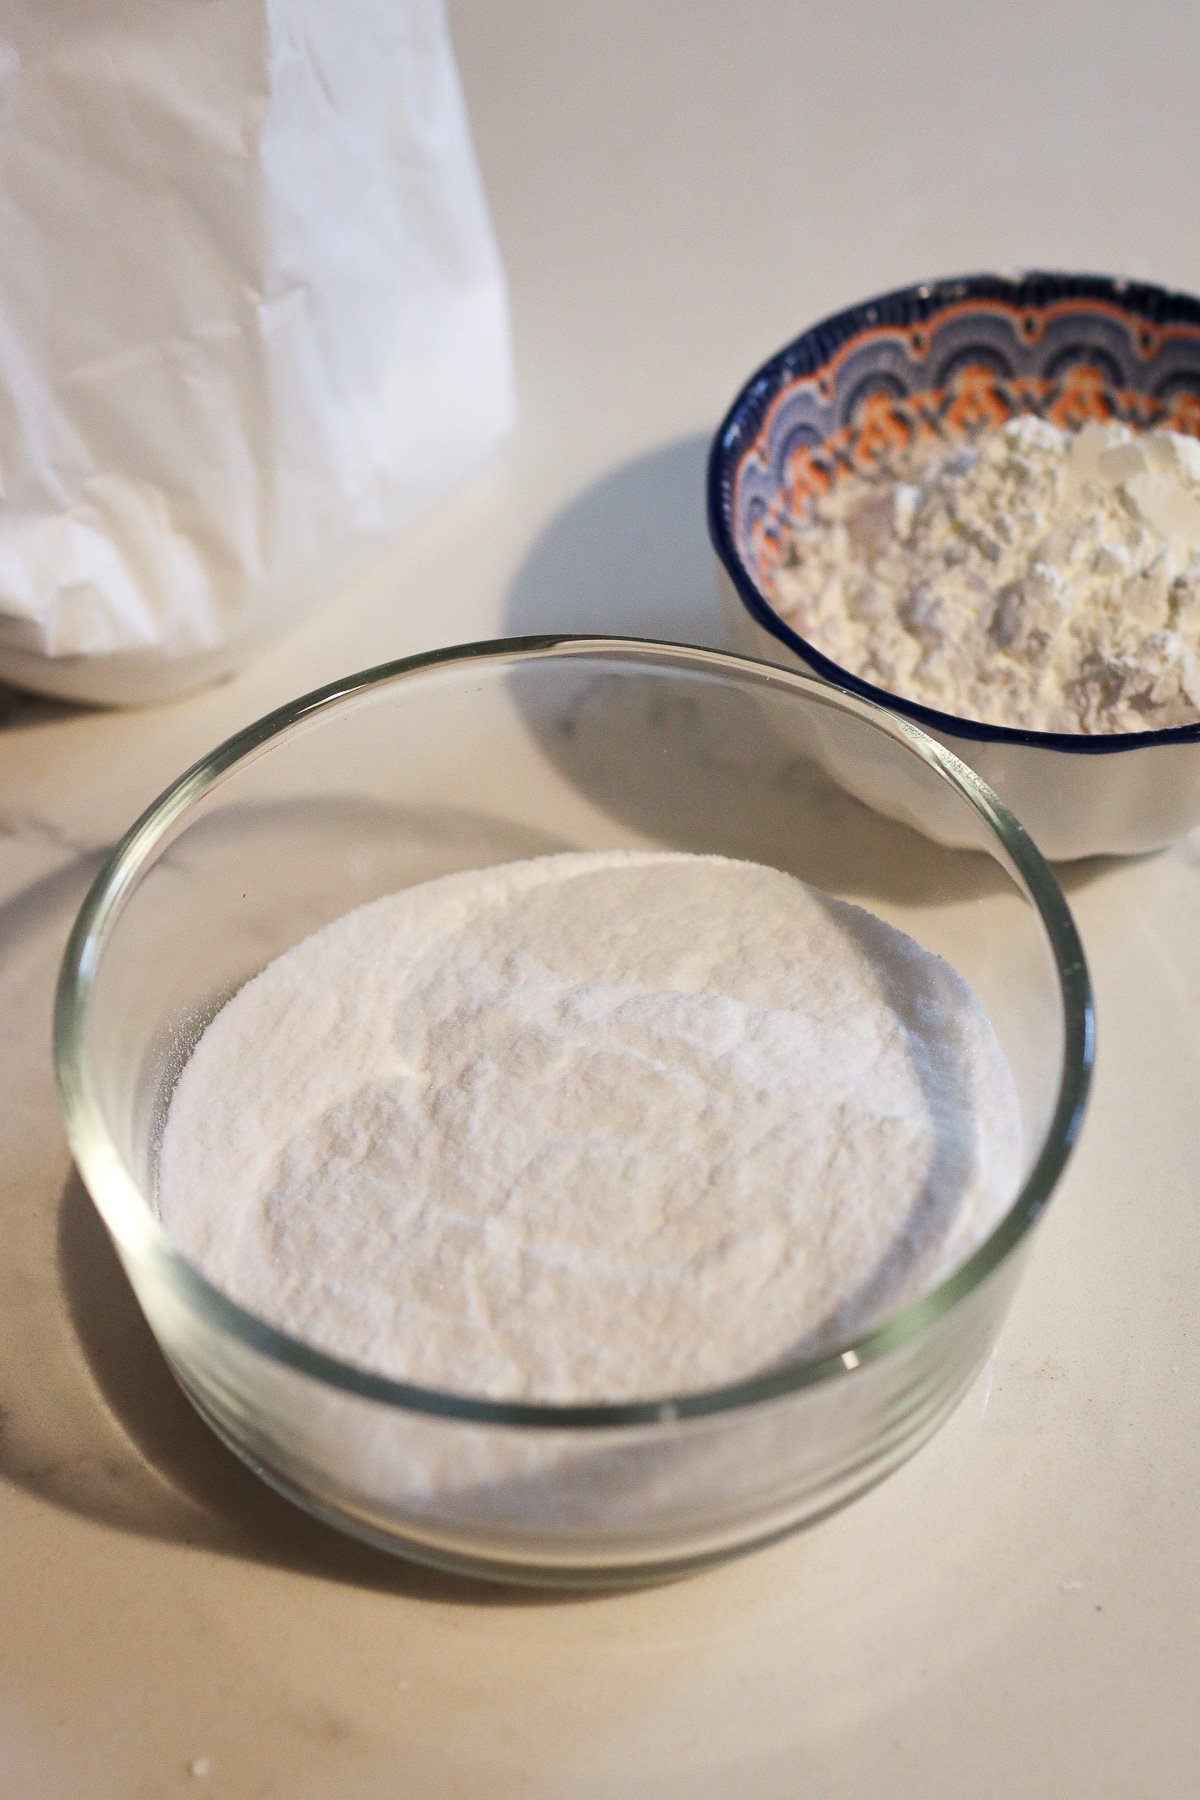
To make these baking soda galaxy ornaments, you only need two ingredients. Well, three, if you count water. You’ll need one cup of baking soda and half a cup of corn starch for the dough base. For the liquid component, measure out 5 fluid ounces of water (approximately two-thirds of a cup, if you don’t have a measuring cup with ounce markings).
For decorating, grab acrylic paint in galaxy colors. Deep blues, purples, pinks, and black work best to create the outer space effect. You can also use nail polish if you prefer, as it works well for this project and provides access to more shimmer and metallic options.
Finally, you’ll need glitter. Either loose glitter to sprinkle on or, easier still, clear glitter nail polish or glitter glue to seal everything with sparkle.
Grab a saucepan for making the dough, a rolling pin, cookie cutters or a knife for cutting shapes, and something to make holes for hanging. I used a toothpick.
Step 1: Make Your Dough

To start, combine 1 cup of baking soda, 1/2 cup of cornstarch, and 5 fluid ounces of water in a saucepan. Place it over medium-low heat and start stirring. Then, don’t stop stirring. The mixture will appear as a liquid at first, but continue stirring as it warms, and it will slowly come together.
After a few minutes, the mixture will start to thicken and come together. It’ll go from soupy to dough-like fairly quickly, so don’t walk away from the stove. Continue stirring until the mixture forms a ball and pulls away from the sides of the pan. The texture should resemble cookie dough.
Once it’s come together into a cohesive dough, turn off the heat and transfer it to a plate or bowl. If your counters are clean and heat-proof, you can leave them there too.
Although it may be tempting to poke at it, you need to let the dough cool for at least 30 minutes before you handle it. Hot baking soda dough is not fun to work with, trust me. Use this cooling time to gather your cookie cutters and set up your workspace.
Step 2: Roll and Cut
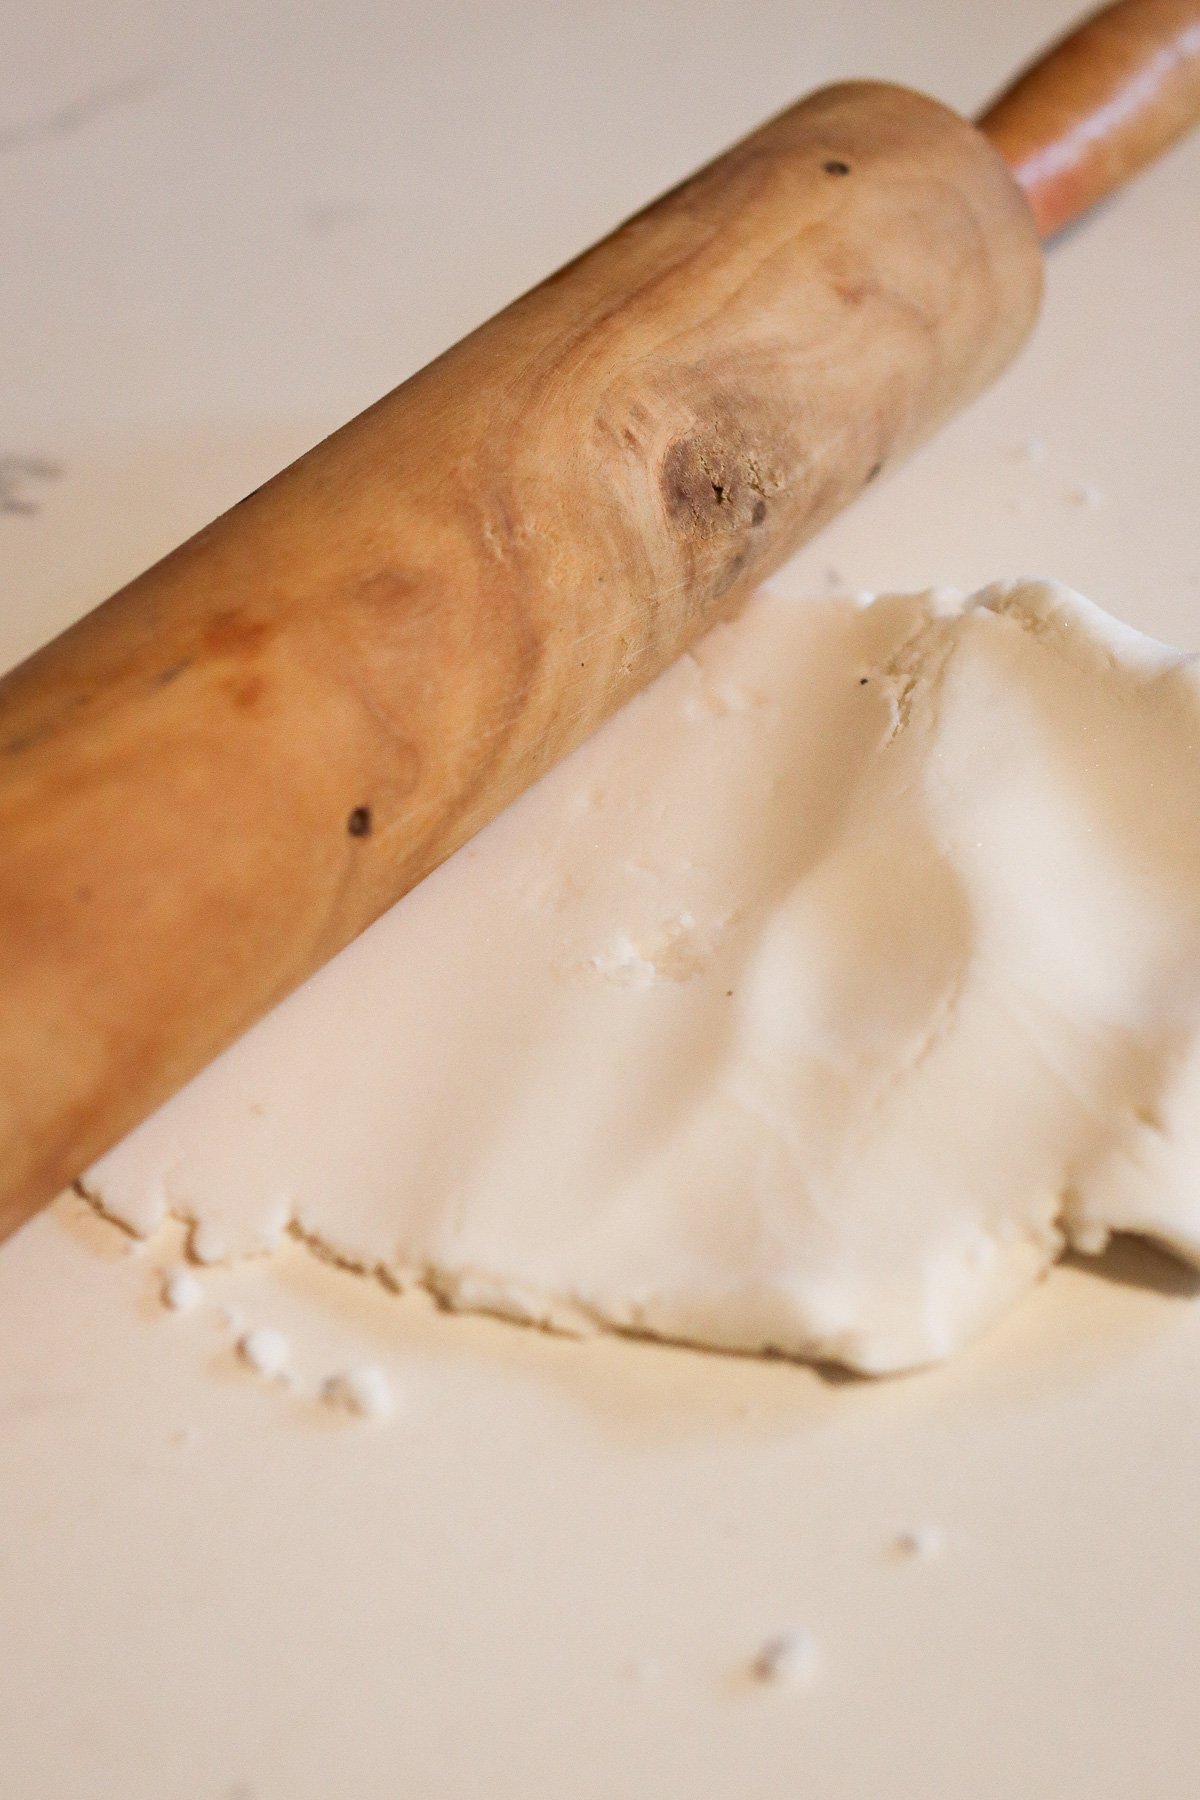
After your dough has cooled, turn it out onto a clean surface and knead it for a minute or two. Kneading makes the dough smoother and shinier, resulting in better-looking finished ornaments. The dough should feel smooth and pliable (kind of like fondant, but softer).
Roll the dough out to about half an inch thick. The thinner you go, the more fragile your baking soda galaxy ornaments will be. Thicker ornaments take longer to dry. So you can decide what look you prefer.
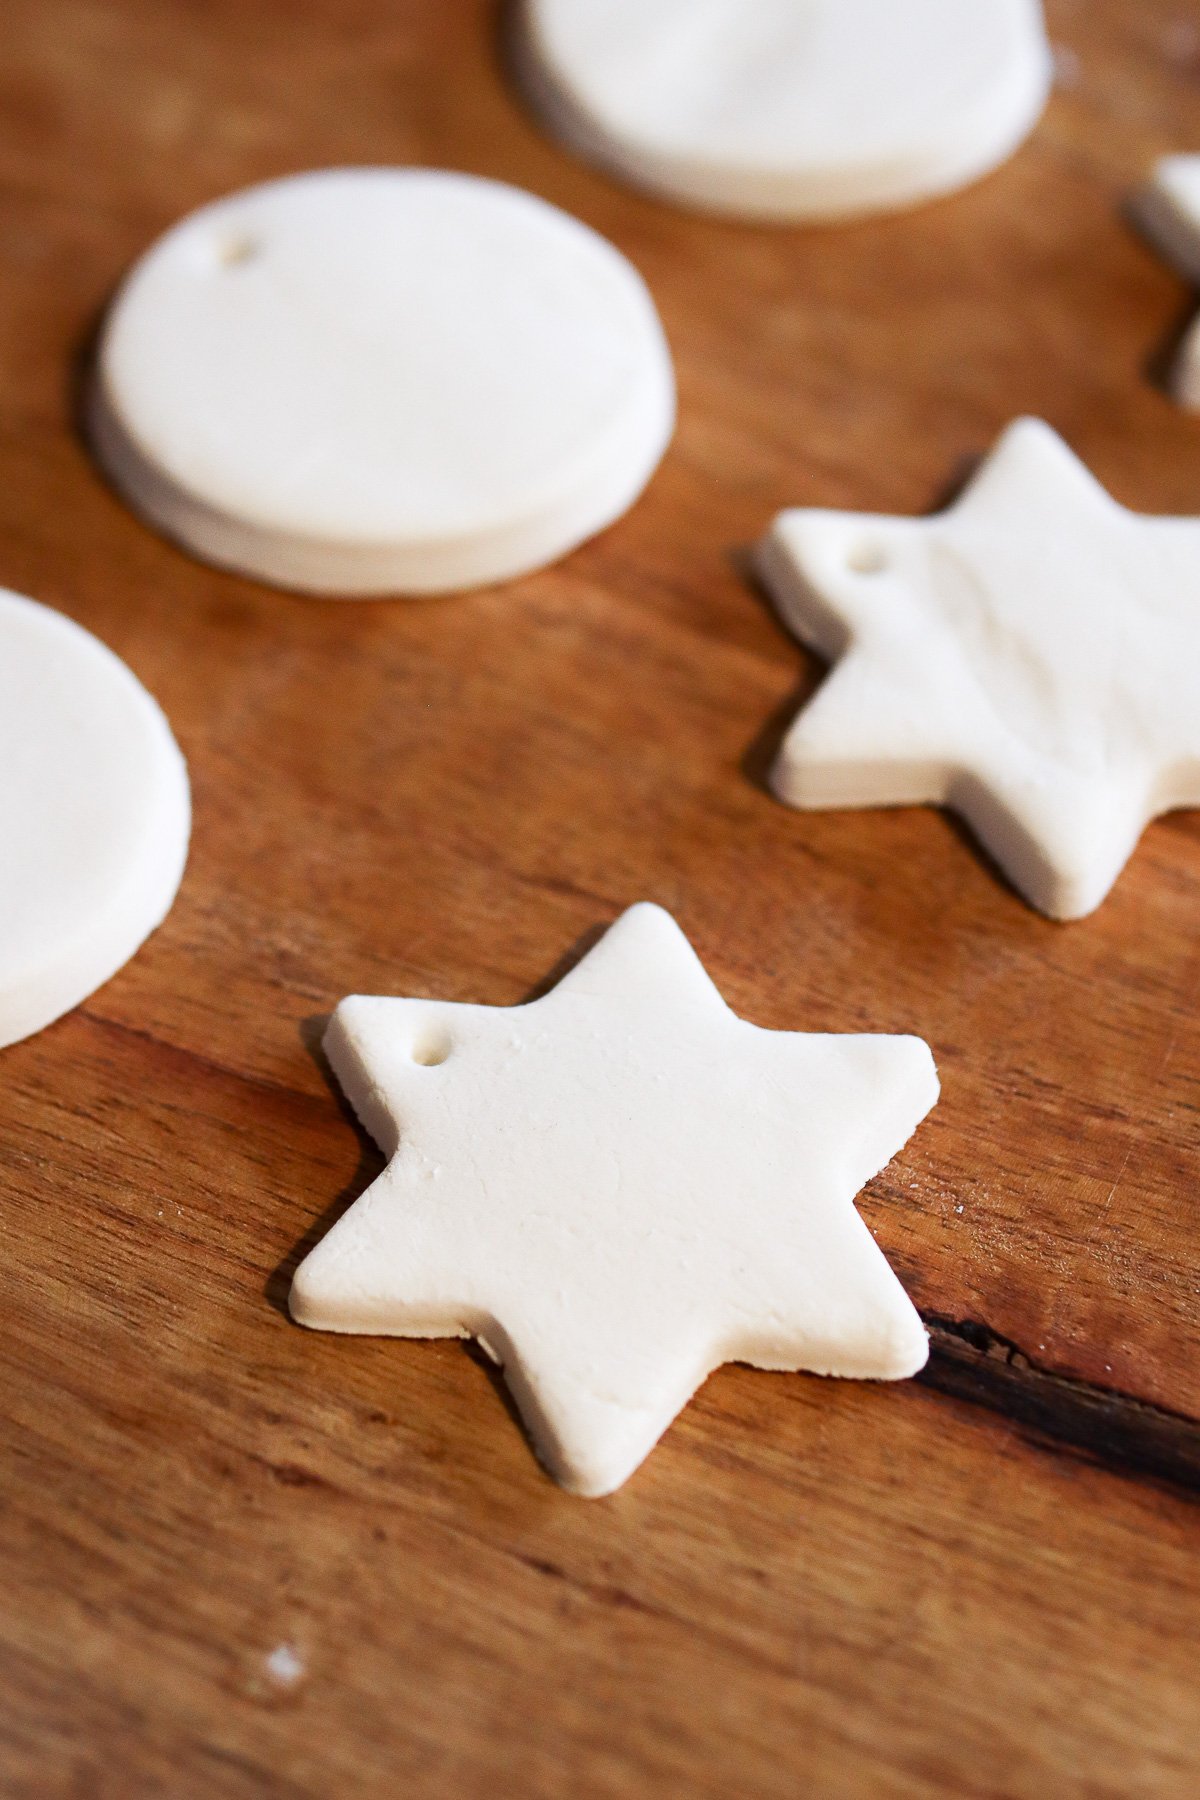
Then, use cookie cutters to cut out your shapes. Circles and stars work particularly well for galaxy designs since they mimic celestial shapes. A simple round ornament gives you the most space to paint swirling galaxy patterns.
Before you move your cut shapes, use a skewer or toothpick to poke a hole near the top of each ornament for hanging. It should be large enough to thread twine or craft wire through. Push the straw or skewer all the way through to create a clean hole on both sides.
Step 3: Set
Now comes the waiting game. You have two options for drying your ornaments, and both have pros and cons. The hands-off method is to simply lay them on a flat surface and let them air dry for 24 to 48 hours. This method requires zero effort but a lot of patience.
If you’re in a hurry, you can dry them in the oven on very low heat (around 180°F). Place them on a baking sheet and bake for approximately 1 hour, turning them halfway through. Check frequently to make sure they’re not browning or cracking. If you see any browning starting, lower your oven temperature. You can also leave the oven door cracked open a little. The ornaments are done when they’re completely hard and no longer feel cool to the touch.
I usually go with the air-dry method because I’m paranoid about the oven ones cracking, but the oven method definitely works if you babysit them. Whichever method you choose, make sure they’re completely dry before you move on to painting. Any moisture left in the dough will cause problems with your paint later.
Step 4: Paint

Time to get creative and paint your galaxy patterns on top of the ornaments. Start with your darkest colors, like black or deep purple, and paint a light base. Leaving some white showing through creates a nice effect. Use the darker base to frame your pattern for the other colors.
For the galaxy swirls, I simply transitioned from the center to swirl bands of color, but you can try any technique you prefer. Dab on blues, purples, pinks, and hints of gold in swirling patterns to blend them. Just don’t overthink it and make it too structured. Real galaxies are chaotic, and so should your ornaments be.
Nail polish works well for this project if you’re not confident with acrylic paint. The colors are vibrant, it’s easy to blend with a sponge, and many nail polishes already have shimmer built in. It also dries quickly, so make sure you work fast if you want any colors to blend.
Once your paint is dry, seal everything with a layer of shimmer. Clear glitter nail polish, painted over the entire ornament, creates an even sparkle that resembles stars scattered across space. You can also opt for a more targeted approach and add glitter only to certain areas, but I prefer the all-over sparkle effect for galaxy ornaments.
Step 5: Hang

After all your paint and glitter have fully dried, thread string or twine through the hole you made earlier. Ribbon works too, but it tends to detract from the already colorful galaxy look.
These baking soda galaxy ornaments look best when grouped with other celestial or dark-toned decorations. Pair them with deep blue and purple ornaments, silver stars, or other space-themed pieces. They can get a bit lost among a tree full of bright, traditional colors, so I recommend placing a couple of dots throughout the tree.
These are not as reflective as glass ornaments, but they have their own subtle charm. Hang them where they’ll catch some light (near tree lights or by a window), and the glitter layer will sparkle.
One practical note: these ornaments are more delicate than commercially made ornaments. They won’t shatter like glass, but they can chip or break if dropped on a hard floor. Store them carefully when the season ends, wrapped individually in tissue paper. Treat them gently and they’ll last for years, becoming part of your collection of handmade holiday memories.