
The classic holiday scent is incomplete without cinnamon. In fact, I think it’s probably the most important component. Cinnamon is warm and cozy without being overpowering, instantly making any room feel more festive. And as a bonus, cinnamon sticks make great scented décor, especially when you turn them into Christmas trees.
What I love most about cinnamon stick Christmas trees is how natural the finished ones look.
They fit with any décor style, from farmhouse to modern minimalist. The cinnamon sticks lend them an organic texture and a wonderful scent that you can’t usually find in store-bought ornaments.
While these are easy to make, there’s a fair bit of gluing involved, and you’ll need some patience to get all those cinnamon sticks positioned just right. However, the actual steps are straightforward, and once you’ve completed one, the rest follow much more quickly.
These trees will make your home smell incredible for weeks. Every time someone walks past one, they’ll catch that cinnamon scent. It’s like having a natural air freshener (that also happens to look beautiful).
What You’ll Need
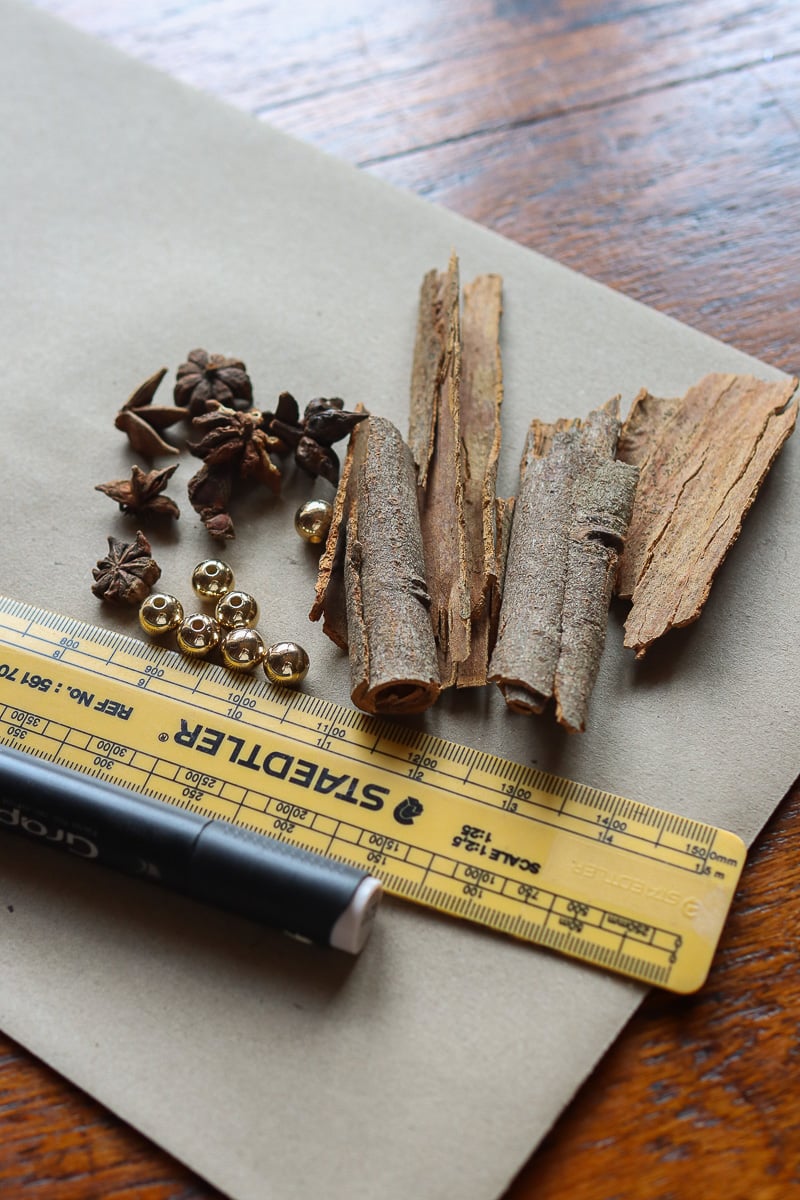
The materials list for making cinnamon stick Christmas trees is refreshingly short. You’ll need cinnamon sticks (obviously), and more than you think. Don’t underestimate how many you’ll need, or you’ll end up making a second trip to the store with hot glue on your fingers. Grab a large bag here and you’ll be set for all of your cinnamon crafts this season.
Next, you’ll need some cardboard to make the cone base. An old cereal box works perfectly for this, but you can also look for stiff card at your local craft store. Use a board that is sturdier and will hold up better under the weight of all those cinnamon sticks rather than regular paper.
A glue gun is your best friend for this project. Regular craft glue just doesn’t have the holding power you need, and it takes forever to dry. Hot glue sets quickly and creates a strong bond that will keep your tree together without struggle.
For decorating, gather whatever small embellishments you like. Star anise, small beads, twine, or tiny bells are good choices. Luckily, you don’t need much to make it look festive.
The only other thing you’ll need is scissors for cutting the cardboard, and maybe a ruler if you want to be precise about your cone measurements. Although, to be honest, I usually just eyeball it.
Step 1: Decide on a Size
Before you start cutting cardboard or heating the glue gun, you need to figure out how big you want your tree to be. The size determines how much material you’ll need and where you’ll be able to display it, so choose carefully.
Smaller cinnamon stick Christmas trees around five inches tall work great for grouping or using as part of a centerpiece. Medium trees make nice standalone decorations for side tables or mantels. Larger trees become statement pieces that need their own space to shine, but do require a lot more cinnamon.
If you have time, you might want to make a few different sizes and display them together. Three trees of varying heights create a nice visual arrangement that’s more interesting than having them all match.
Step 2: Make a Cardboard Cone
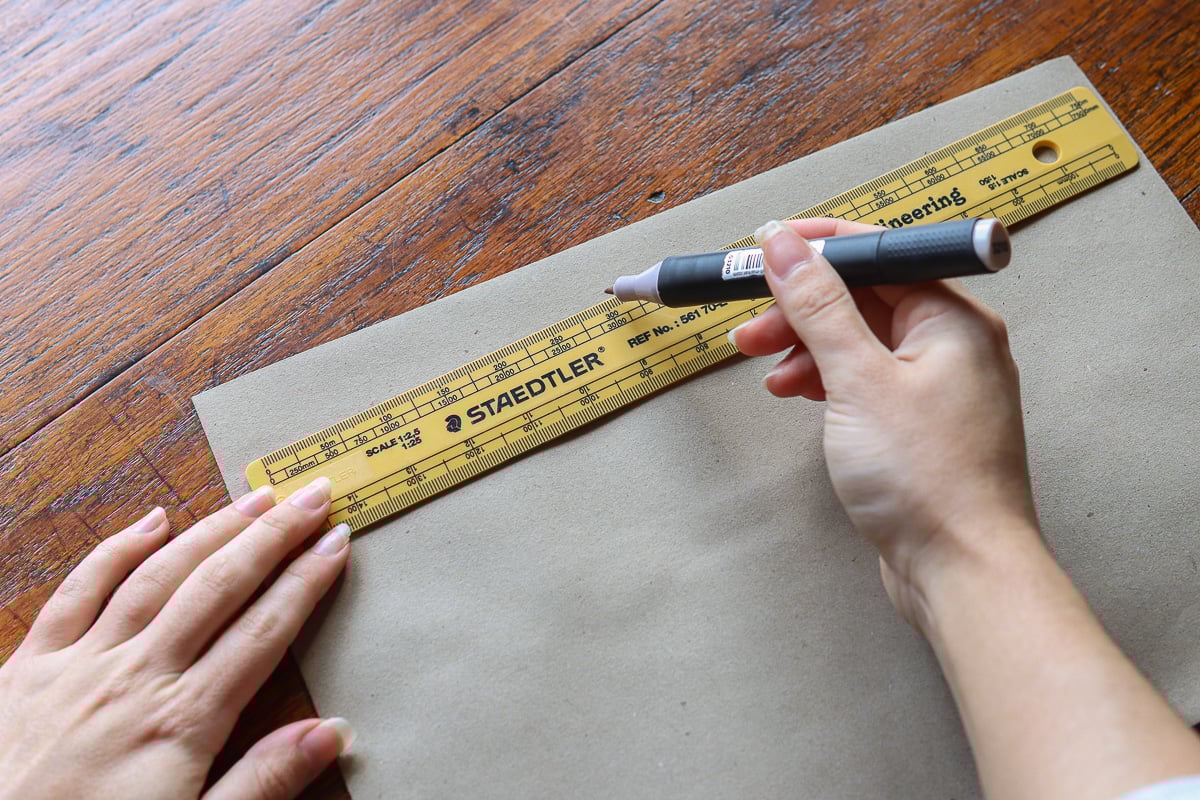
To start, you need a base to glue the cinnamon sticks to. Start by cutting a large triangle from your cardboard with a rounded base, or a semi-circle that you trim later. The base of the triangle determines how wide your tree will be, and its height determines how tall it will ultimately grow.
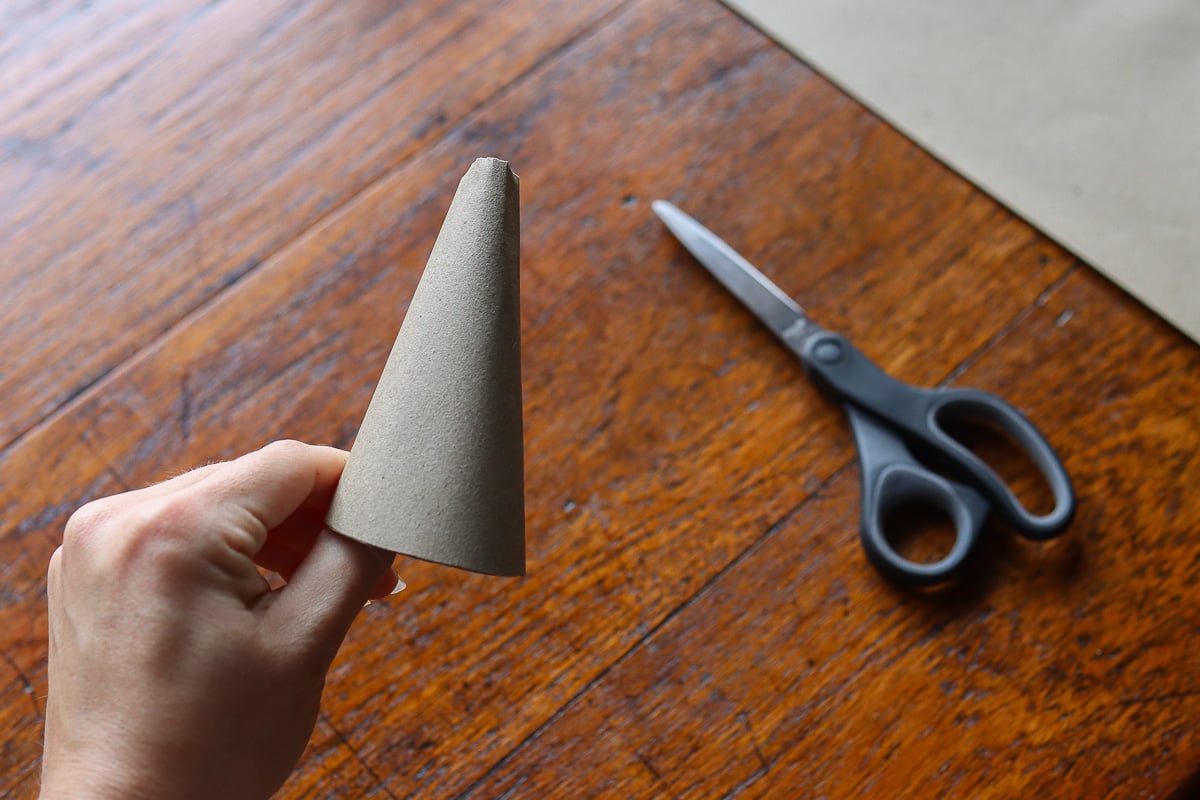
Roll the triangle into a cone shape, overlapping the edges until you’re happy with the proportions. The tighter you roll it, the narrower your cone will be. I prefer a slightly wider base because it provides the tree with better stability and makes it look more realistic. Once you’ve achieved the desired shape, secure the seam with hot glue on both the inside and outside (or use tape). Let it dry completely before moving on.
Trim the bottom of the cone if it’s uneven so your tree will stand upright without wobbling. Test it on a flat surface and make any adjustments now rather than after you’ve glued on all the cinnamon sticks.
Step 3: Glue on the Cinnamon Sticks
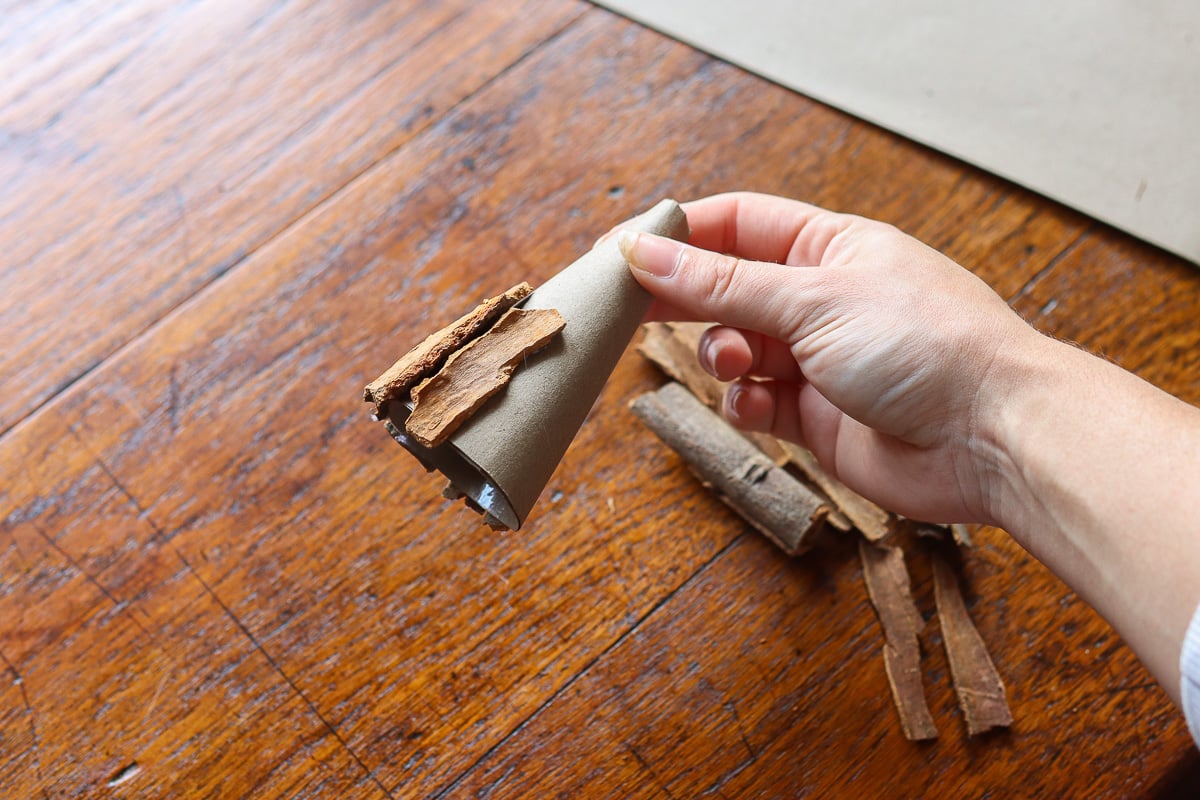
Now to the cinnamon. Start at the bottom of your cone and work your way up, gluing cinnamon sticks vertically around the cardboard base. Apply a line of hot glue to the back of each cinnamon stick and press it firmly against the cone, holding it for a few seconds until it sets.
Position the sticks as close together as possible so you don’t see gaps of cardboard peeking through.
They won’t fit together perfectly because cinnamon sticks are naturally uneven, and that’s actually what makes these trees look so good. Those little gaps and variations give the trees character and make them look handmade in the best way. You can also fill in gaps later by jamming offcuts of your cinnamon sticks between the glued ones.
As you work your way up toward the top, you’ll need to trim some cinnamon sticks to fit.
The cone gets narrower, so full-length sticks won’t work. Just snap or cut them to size. Cinnamon sticks break pretty easily, so you don’t need any special tools.
Continue layering and gluing until you reach the top point. For the very tip, you can use one small piece of cinnamon stick standing upright to create a little tree topper effect. Alternatively, top with something like star anise or a dried orange slice.
Step 4: Decorate
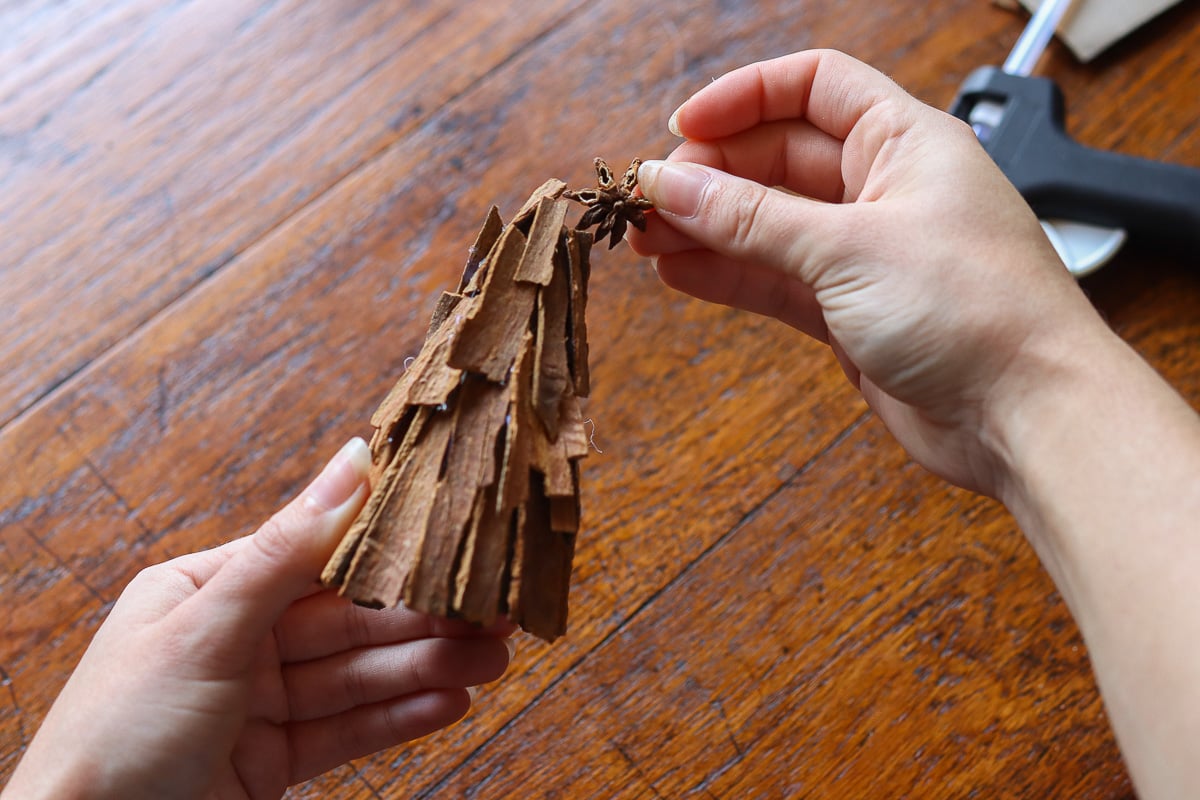
Once all your cinnamon sticks are in place and the glue has dried, it’s time to add those finishing touches that take your tree to the next level. This is the fun part where you can really make the tree your own.
Star anise is my go-to decoration for these trees. The shape looks like little stars scattered across the branches, and the scent pairs perfectly with cinnamon. Just glue them on wherever you see a nice spot. You can also tuck small sprigs of dried greenery between the cinnamon sticks, or add tiny pinecones if you have them.
For a more festive look, glue on small bells or beads. Red beads evoke a traditional Christmas feel, while gold beads lend the tree a more elegant appearance. You can also wrap thin twine or ribbon around the tree in a spiral like tinsel, though I find this works better on larger trees where you have more space to work with.
Don’t go overboard with decorations. The cinnamon sticks are already doing a lot of visual heavy lifting, so you want to add subtle touches rather than covering the whole thing.
How to Use Them
These cinnamon stick Christmas trees are incredibly versatile. The most obvious place to display them is on your mantel, either as a standalone piece or grouped with other natural decorations, such as pinecones and greenery. I’ve also dusted mine with some fake snow for a more wintery feel.
They also work beautifully as centerpieces for your dining table.
You can place one in the center surrounded by tea lights or small candles. The candlelight catches the texture of the cinnamon sticks, creating a warm, cozy glow. Just make sure to keep the candles at a safe distance, since cinnamon sticks are flammable.
For a more creative display, try grouping three trees of different heights on a side table or bookshelf. The varying sizes create visual interest, and having multiple trees makes a greater impact than a single one. You can also place small trees inside a wooden bowl or on a decorative tray along with other natural elements.
These cinnamon stick Christmas trees also hold up well if stored carefully. Wrap them loosely in bubble wrap and keep them in a box in a cool, dry place. They’ll last for years, and the cinnamon scent (while it fades a bit) never completely goes away. Bring them out and give them a spritz with water infused with cinnamon essential oil each holiday season to revive them.
