
These hot chocolate ornaments showed up all over my social media feed last year, and I kept thinking they looked too good to be true.
They look so adorable, and I thought there must be too many steps or complicated materials I don’t usually have. Well, I tested out a bunch of tutorials and found the method that I think looks the most realistic without being too difficult to complete.
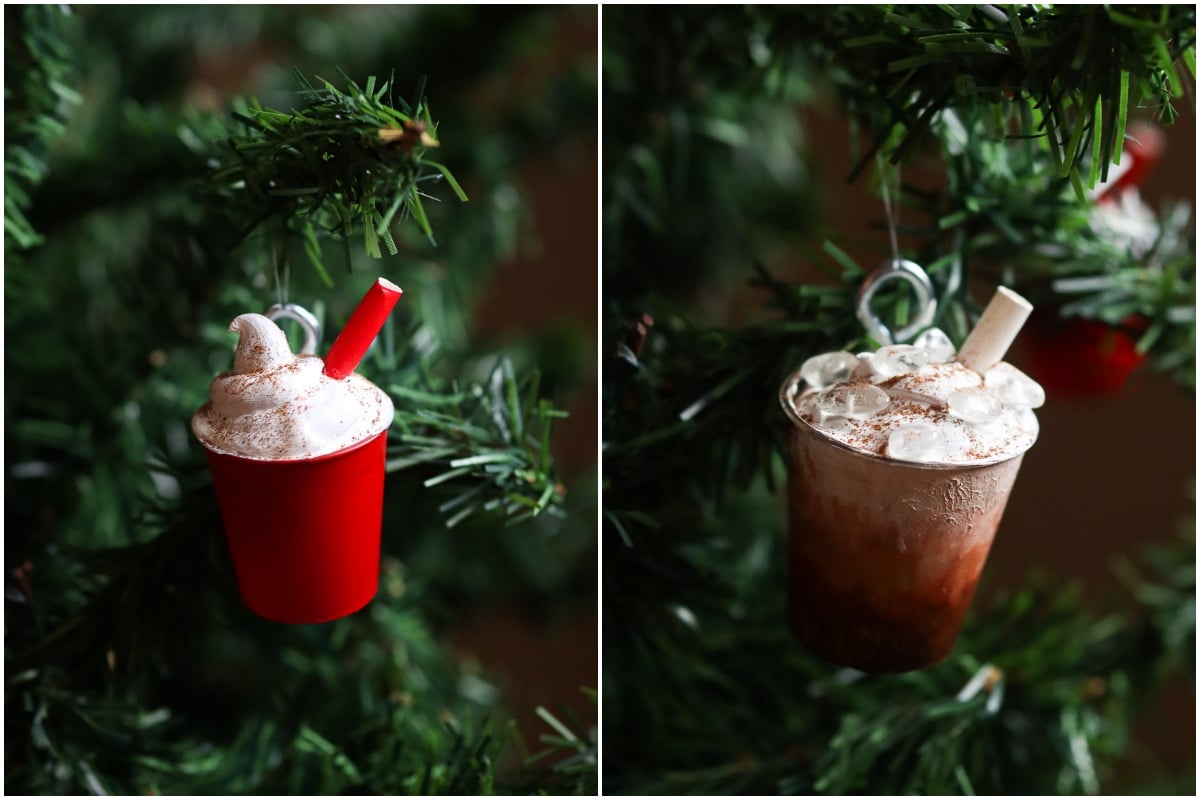
Besides the fact that they look super cute, what drew me to this project was the versatility. The base is the same, so you can customize your hot chocolate to look exactly how you want it to appear on your tree. Or, you can turn it into your favorite drink instead, like a little iced coffee. And they’re surprisingly durable. Once everything dries and sets, these ornaments will last for years.
This craft does require some patience. The sealer takes time to dry, and rushing through it will ruin the effect. But if you can wait out the drying time, you’ll end up with ornaments that look genuinely impressive. People have asked me where I bought mine, and telling them I made them feels pretty satisfying.
What You’ll Need
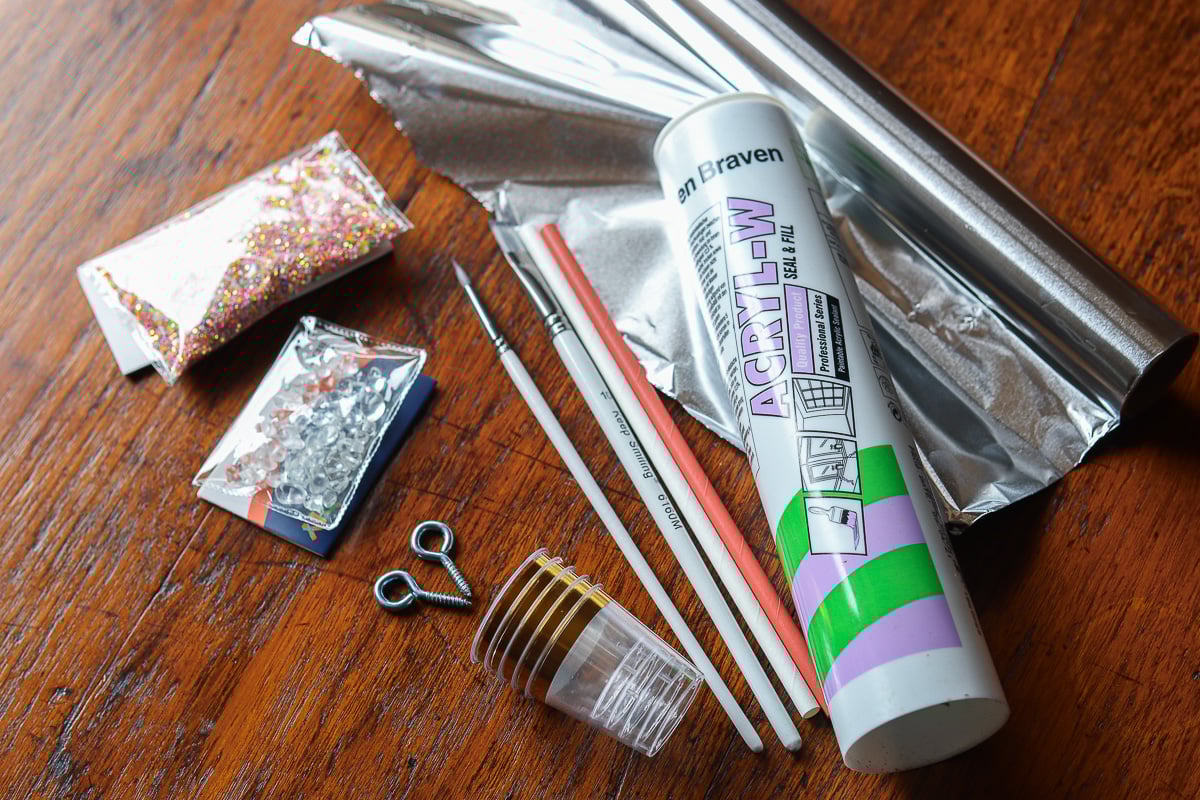
Unlike some of my other DIYs, this project requires a few specific items you might not have lying around. For starters, plastic shot glasses form the base of each ornament. Clear cups allow you to paint them however you wish. You can also use larger plastic cups if you prefer.
The magic ingredient is paintable caulk/sealant. Acrylic works best for this project. You can find it at nearly any hardware store or you can pick up a tube here. This is what creates the whipped cream effect. It generally comes in two forms: a tube that will require a caulking gun or a smaller tube that already has a tip that you cut to size to apply. Both work fine for this project, but if you plan on making more than three ornaments, I recommend going with the large tube.
You’ll also need aluminum foil to pipe the sealer onto, which will be fitted inside the glass. You’ll paint the glass later to look like a mug or like hot chocolate, so you won’t see the foil inside.
Also grab some paper straws. These red and white striped ones look particularly cute. Small eye screws let you hang the ornaments, and you’ll need acrylic paint in whatever colors you want for decorating.
Step 1: Fill the Shot Glass with Foil
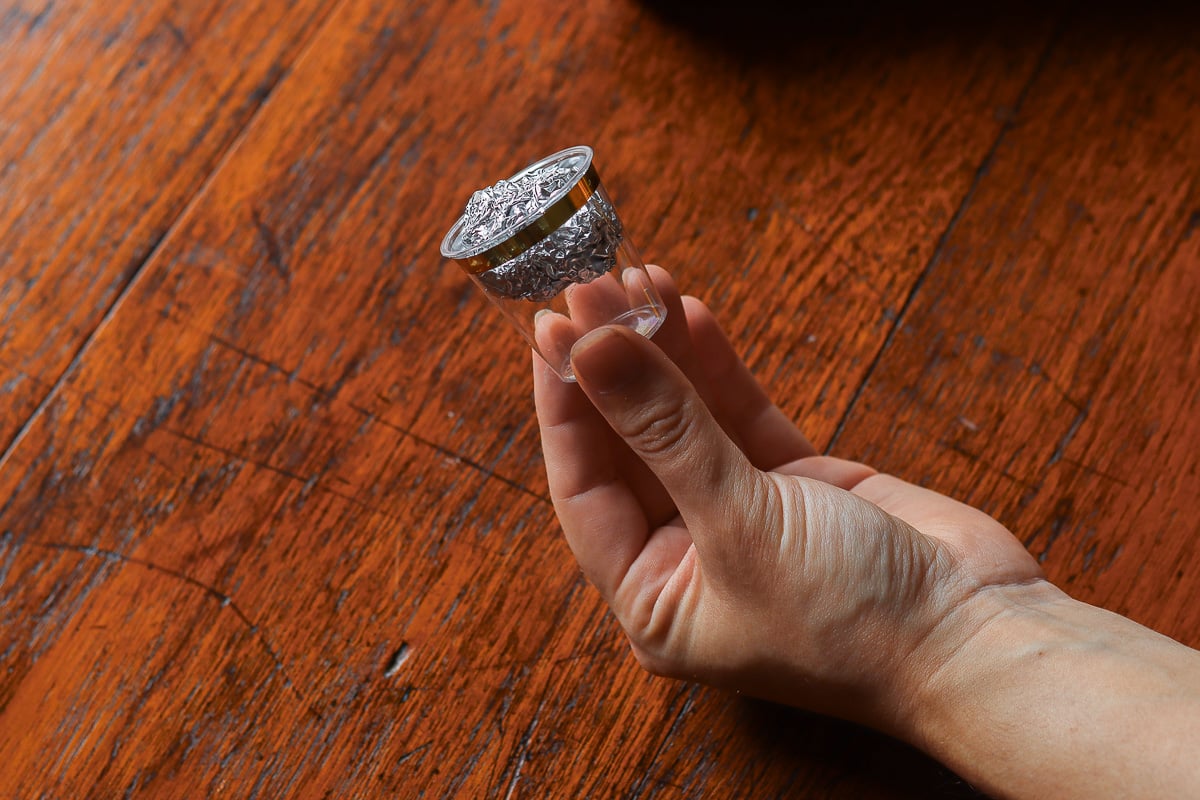
This step is more important than it seems. Without it, your piped ‘whipped cream’ will deflate and fall into the glass.
Crumple aluminum foil into a ball that fits snugly inside your shot glass, filling it almost to the top. The foil gives the glass structure and prevents the sealer from collapsing inward when you pipe it on top. It also adds weight, so the ornament doesn’t feel unbalanced.
Press the foil down firmly so it’s packed in there, but leave a bit of space at the top. You want room for the sealer to sit on the rim without spilling over the edge. The foil doesn’t need to be smooth or pretty since you’ll be covering it later. Just make sure it’s secure and won’t shift around.
Some people use clay or other materials for this step, but foil is lighter and easier to work with. Plus, it’s something most people already have at home, so you’re not making another trip to the craft store.
Step 2: Pipe the Sealer
Here’s where things get fun, but a little tricky. Using either the small tube or the caulking gun, pipe the caulk around the rim of the shot glass in a swirling motion, just like you would add whipped cream to real hot chocolate. Start at one side and work your way around, building up the sealer so it has height and dimension.
The key is not overthinking it. Real whipped cream isn’t perfectly uniform, so your sealer shouldn’t be either. Let it pile up in some areas and leave gaps in others for a natural, dolloped look. If you mess up, you can scrape it off and try again before it dries (the sealer is forgiving that way).
Don’t worry if it’s not perfect on your first attempt. I practiced on paper a couple of times to get the hang of it before I started on the glass. Luckily, even wonky whipped cream looks charming on these hot chocolate ornaments.
Step 3: Add the Straw and Eye Screw
While the sealer is still wet, insert your straw at an angle into the whipped cream, pushing it down until it reaches the foil inside the glass. The sealer will hold the straw in place as it dries, so position it where you want it now. I usually angle mine slightly to one side rather than sticking it straight up.
Next, place a small eye screw into the sealer on the opposite side from where you placed the straw. This is what you’ll use to hang the ornament later, so make sure it’s secure. Push it down until only the loop is visible above the surface of the sealer. You can find much smaller eye screws in the jewelry making section of a craft store or you can get them here.
Both the straw and eye screw need to be positioned before the sealer starts setting up, so work relatively quickly during this step. Once everything is in place, resist the urge to adjust things. Let the sealer do its job and hold everything where you put it so you don’t mess with the swirl you’ve made. It’s so easy to fiddle, but the small movements show up later.
Step 4: Wait to Dry

This is the hard part: waiting. The sealer needs to dry completely before you can paint anything, and depending on the brand and how thickly you applied it, this can take anywhere from several hours to overnight. Check the instructions on your label for drying times.
Don’t rush this step. I know it’s tempting to start painting as soon as the surface feels dry to the touch, but if the sealer hasn’t cured all the way through, your paint will cause it to deform. Set your ornaments somewhere safe where they won’t be disturbed, and just leave them alone.
I made these ornaments in the evening and let them dry overnight, then painted them the next day. It helps to make several at once, so you’re not just sitting around waiting for one ornament to dry. It’s a great excuse to make a whole set.
One thing to note: if the sealer hasn’t gripped the screw after drying and it feels a bit unstable, add a dollop of glue for extra security. This only happened to one of the four that I made, but it’s better to be safe since all the weight from hanging will be on this hook.
Step 5: Paint and Decorate
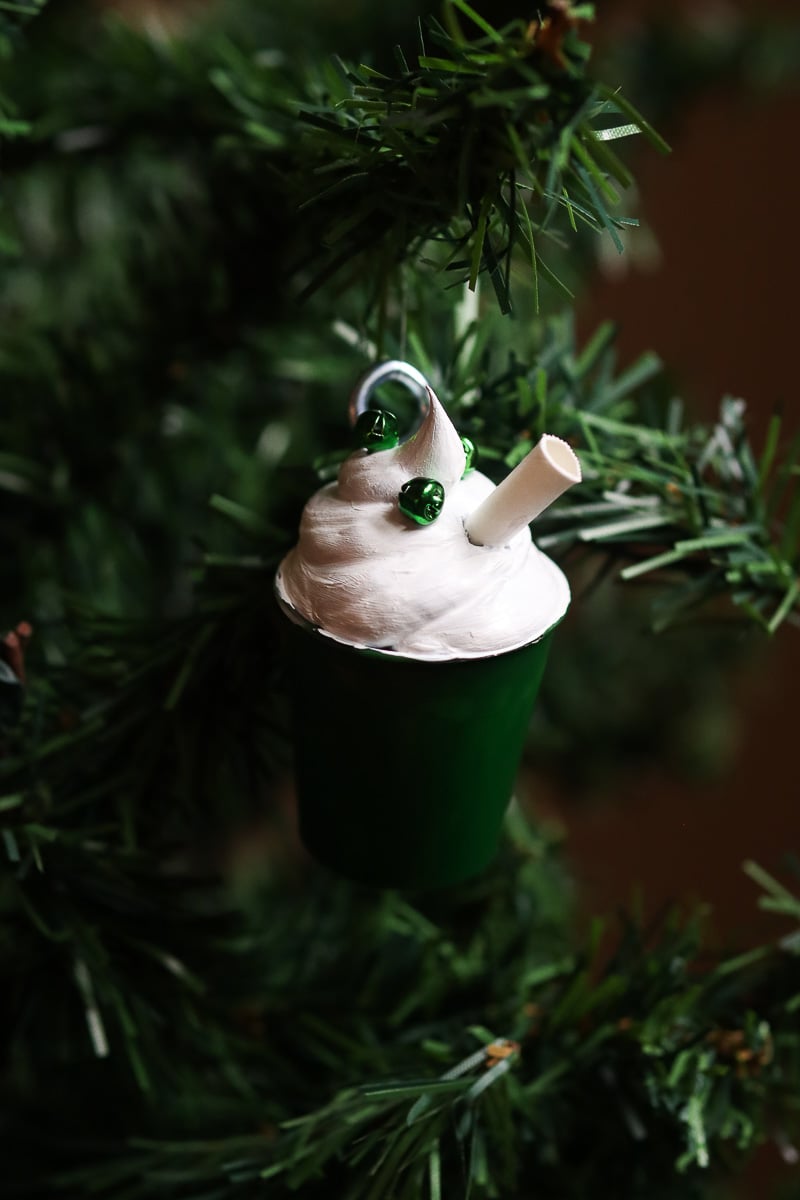
Once the sealer is fully dry, you can paint. For the glass, you can use brown acrylic paint to color it, making it look like cocoa and the glass clear, or you can use a color to make it look like a mug. I tried a classic red and green pairing, keeping the cups simple to let the tops shine, but it’s also fun to paint designs on the sides that add to the Christmas feel.
The whipped cream part is usually best painted white. (If your caulk is white, you don’t need to paint it.) You can add details if you’re feeling ambitious. You can paint the very tops of the swirls with a light tan color to give them depth, or add a few drops of brown paint to look like cocoa powder or cinnamon sprinkled on top. Tiny red and white details painted onto the straw make it look like a peppermint stick.
Glue on miniature embellishments like tiny beads to represent sprinkles, small buttons, or even glitter. Keep your additions small and light so they don’t throw off the ornament’s balance.
Step 6: Hang
Thread a piece of string, ribbon, or thin floral wire through the eye screw you embedded in the sealer. Tie it securely, making sure your knot won’t slip through the hook. Cut the ends to your desired length, depending on where you want the ornament to hang on your tree.
These hot chocolate ornaments are lightweight enough that they won’t weigh down branches, but they’re also substantial enough that they don’t spin around wildly at the slightest breeze. The shot glass gives them a nice weight distribution.
Make sure the ornament hangs as level as possible. It will tilt slightly, unless you place the hook at the very top. If it tilts too much, adjust where the string attaches to the hook until it balances properly.
Variations
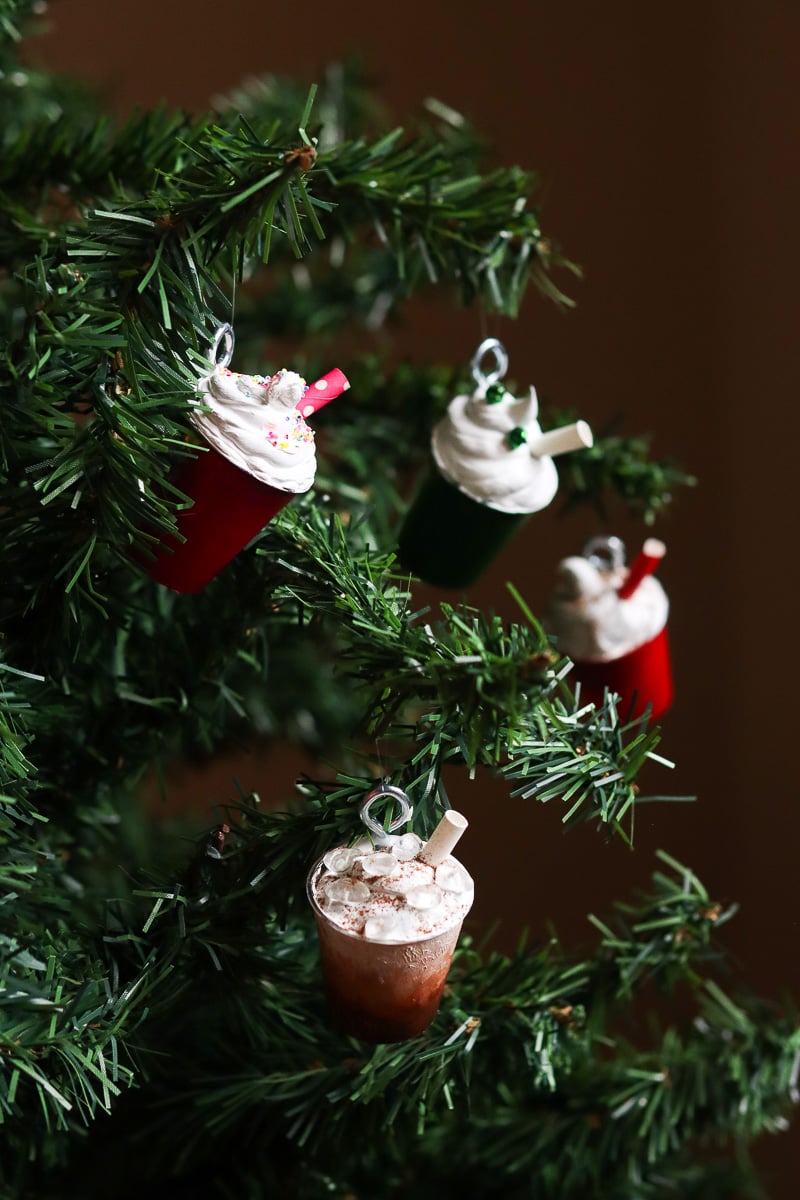
The basic technique opens up a lot of creative possibilities once you’ve mastered it. Instead of hot chocolate, make coffee ornaments by adding just a thin layer of sealer to represent foam and painting the glass a coffee color. I added small, clear pebbles on the top to look like ice. Getting the blending right on the paint was a little tricky, but they look super cute when you step back.

Milkshake ornaments work too. Use pink or brown paint for strawberry or chocolate, and pile the sealer high like soft serve. I added small sequins on the top to look like sprinkles, too, and matched the straw to the pink design.

For a whole hot chocolate bar theme, make ornaments with different toppings. One could have candy cane pieces (tiny red and white painted dots), another could have marshmallows (small white beads glued on top of the sealer), and another could have chocolate chips. Display them all together on one section of your tree for a cohesive look.
Hot chocolate ornaments are one of my favorite Christmas DIYs so far, but they don’t have to be limited to the holiday season. With a bit of creativity, you can find a use for them year-round. Once you’ve made a few, try out some of these adorable candy cane crafts.